
How to include a faucet in an email newsletter
Purpose
The purpose of this tutorial is to show you how to include a lightning network faucet in an email newsletter.
WHY WOULD YOU WANT A FAUCET IN A NEWSLETTER?
Great question. Maybe you want to reward readers. Maybe you’ve got a sponsor and they want to reward your readers. Maybe you want to send a faucet to readers ONLY IF they complete a certain action. Maybe you’re generous and want to share some love.
I don’t care about your reason! I want to show you how to do this!
Description of this walkthrough
I’m going to make an email newsletter that has a faucet in the body of the email. Readers will be able to grab some sats right from the email, no additional additional clicking.
There are more advanced ways to use Mailchimp such as automation, segments, and tags. For this exercise, we will be using a standard email campaign with a faucet hosted on Paywall.Link.
Tools
I will be using Paywall.Link and Mailchimp as my primary tools for this tutorial. Go setup accounts for these tools and then come back!
Go to Paywall.Link Go to Mailchimp
Go to Paywall.Link and setup that faucet
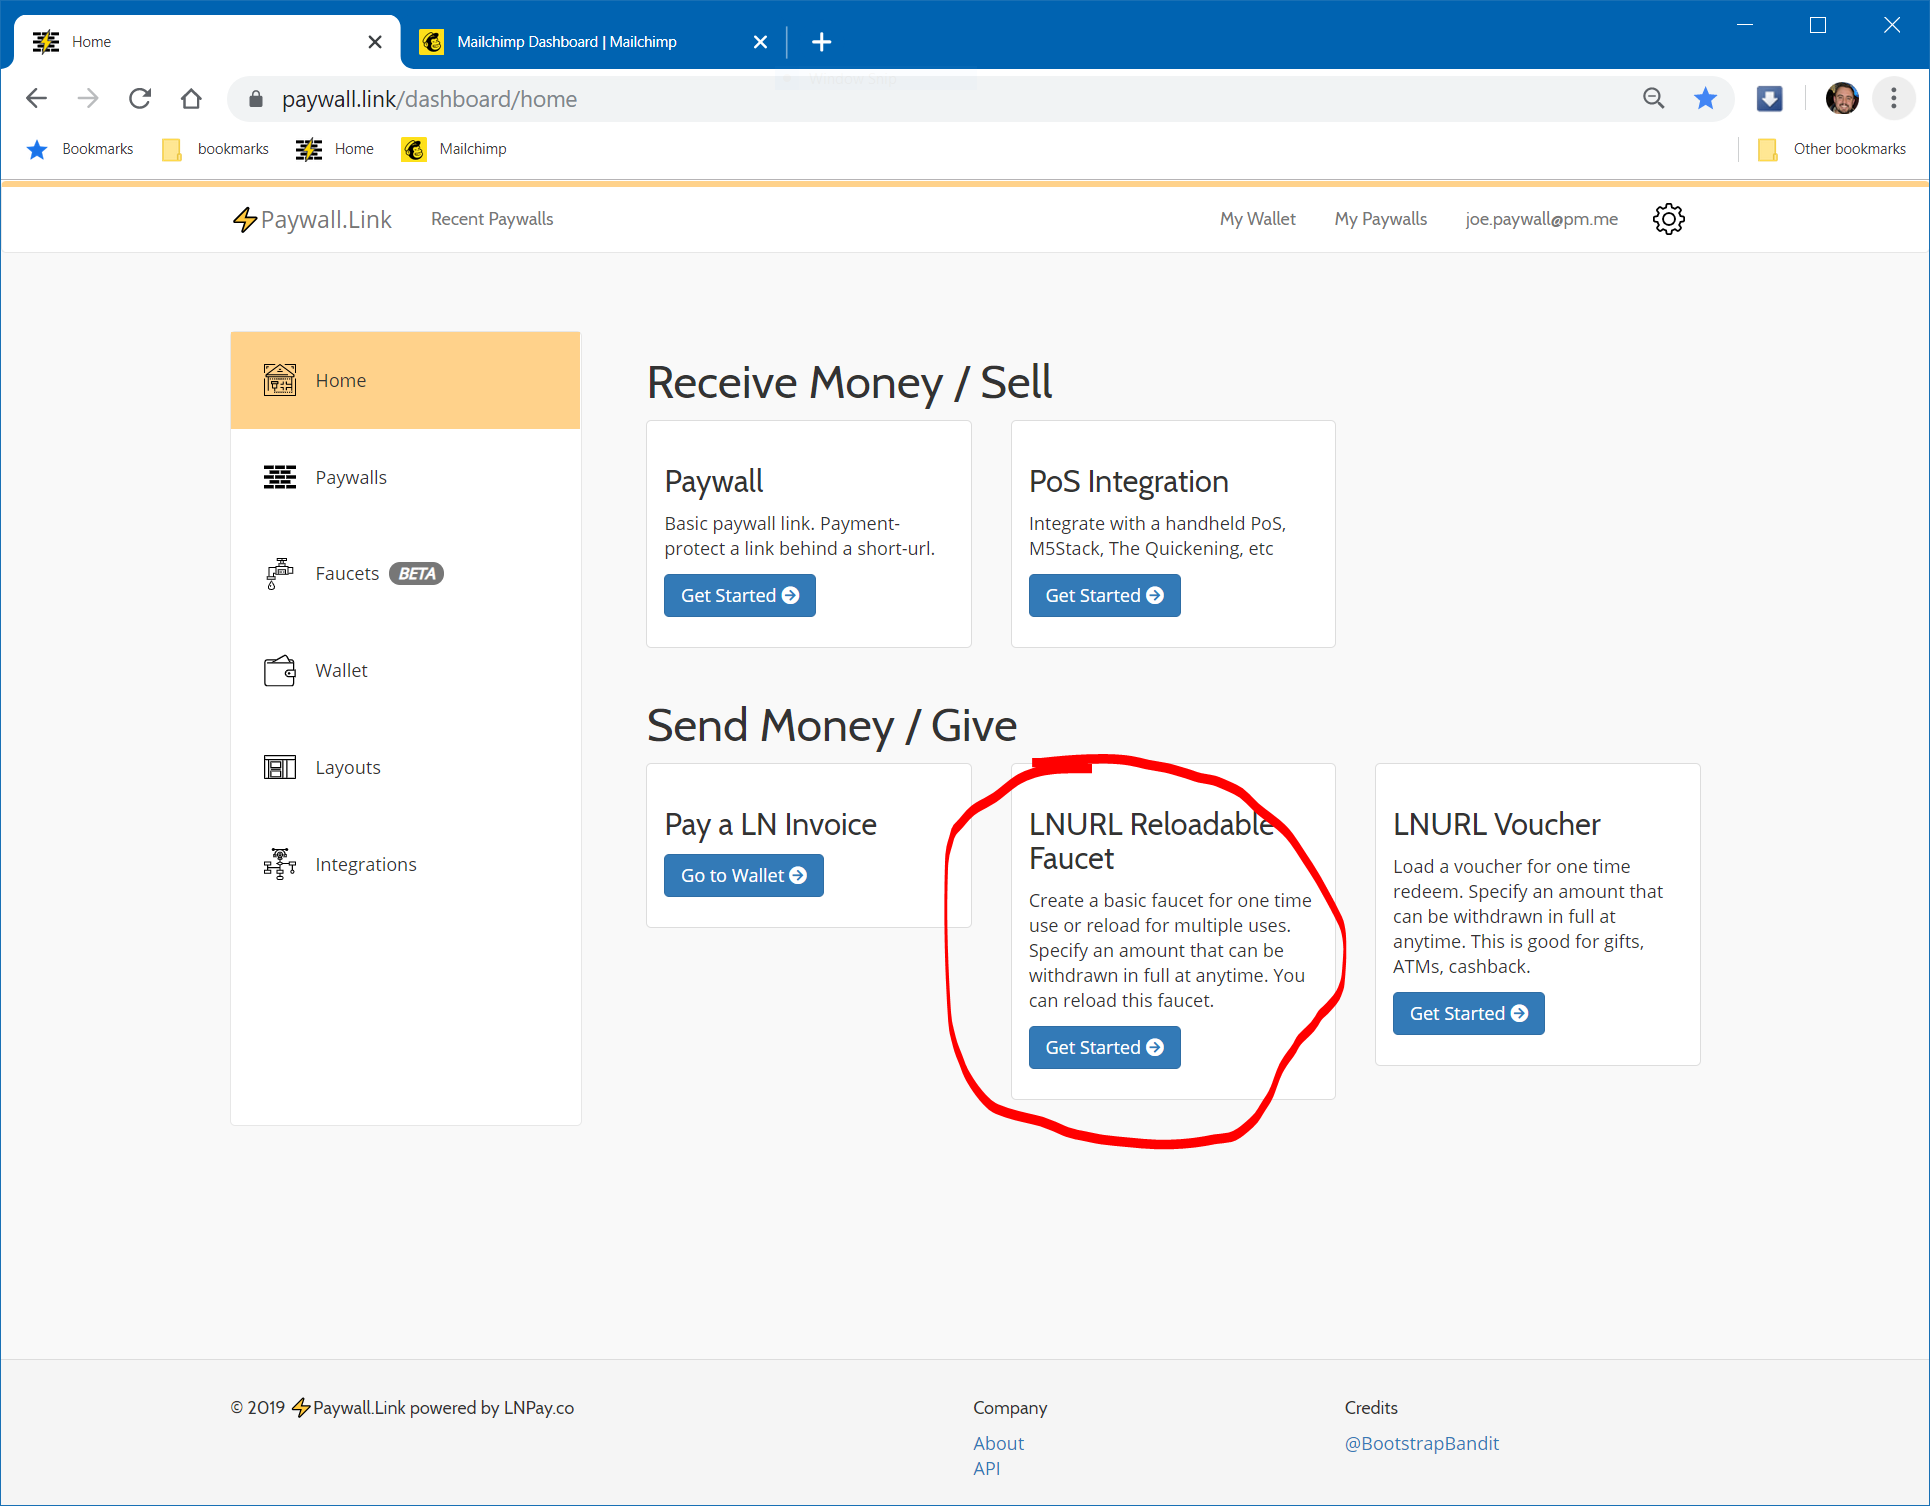
First things first, you’ve got to setup a faucet. I’m assuming you’ve got a fresh account with Paywall.Link and are ready to change the world.
You need to make a faucet. Click the button that’s circled below:
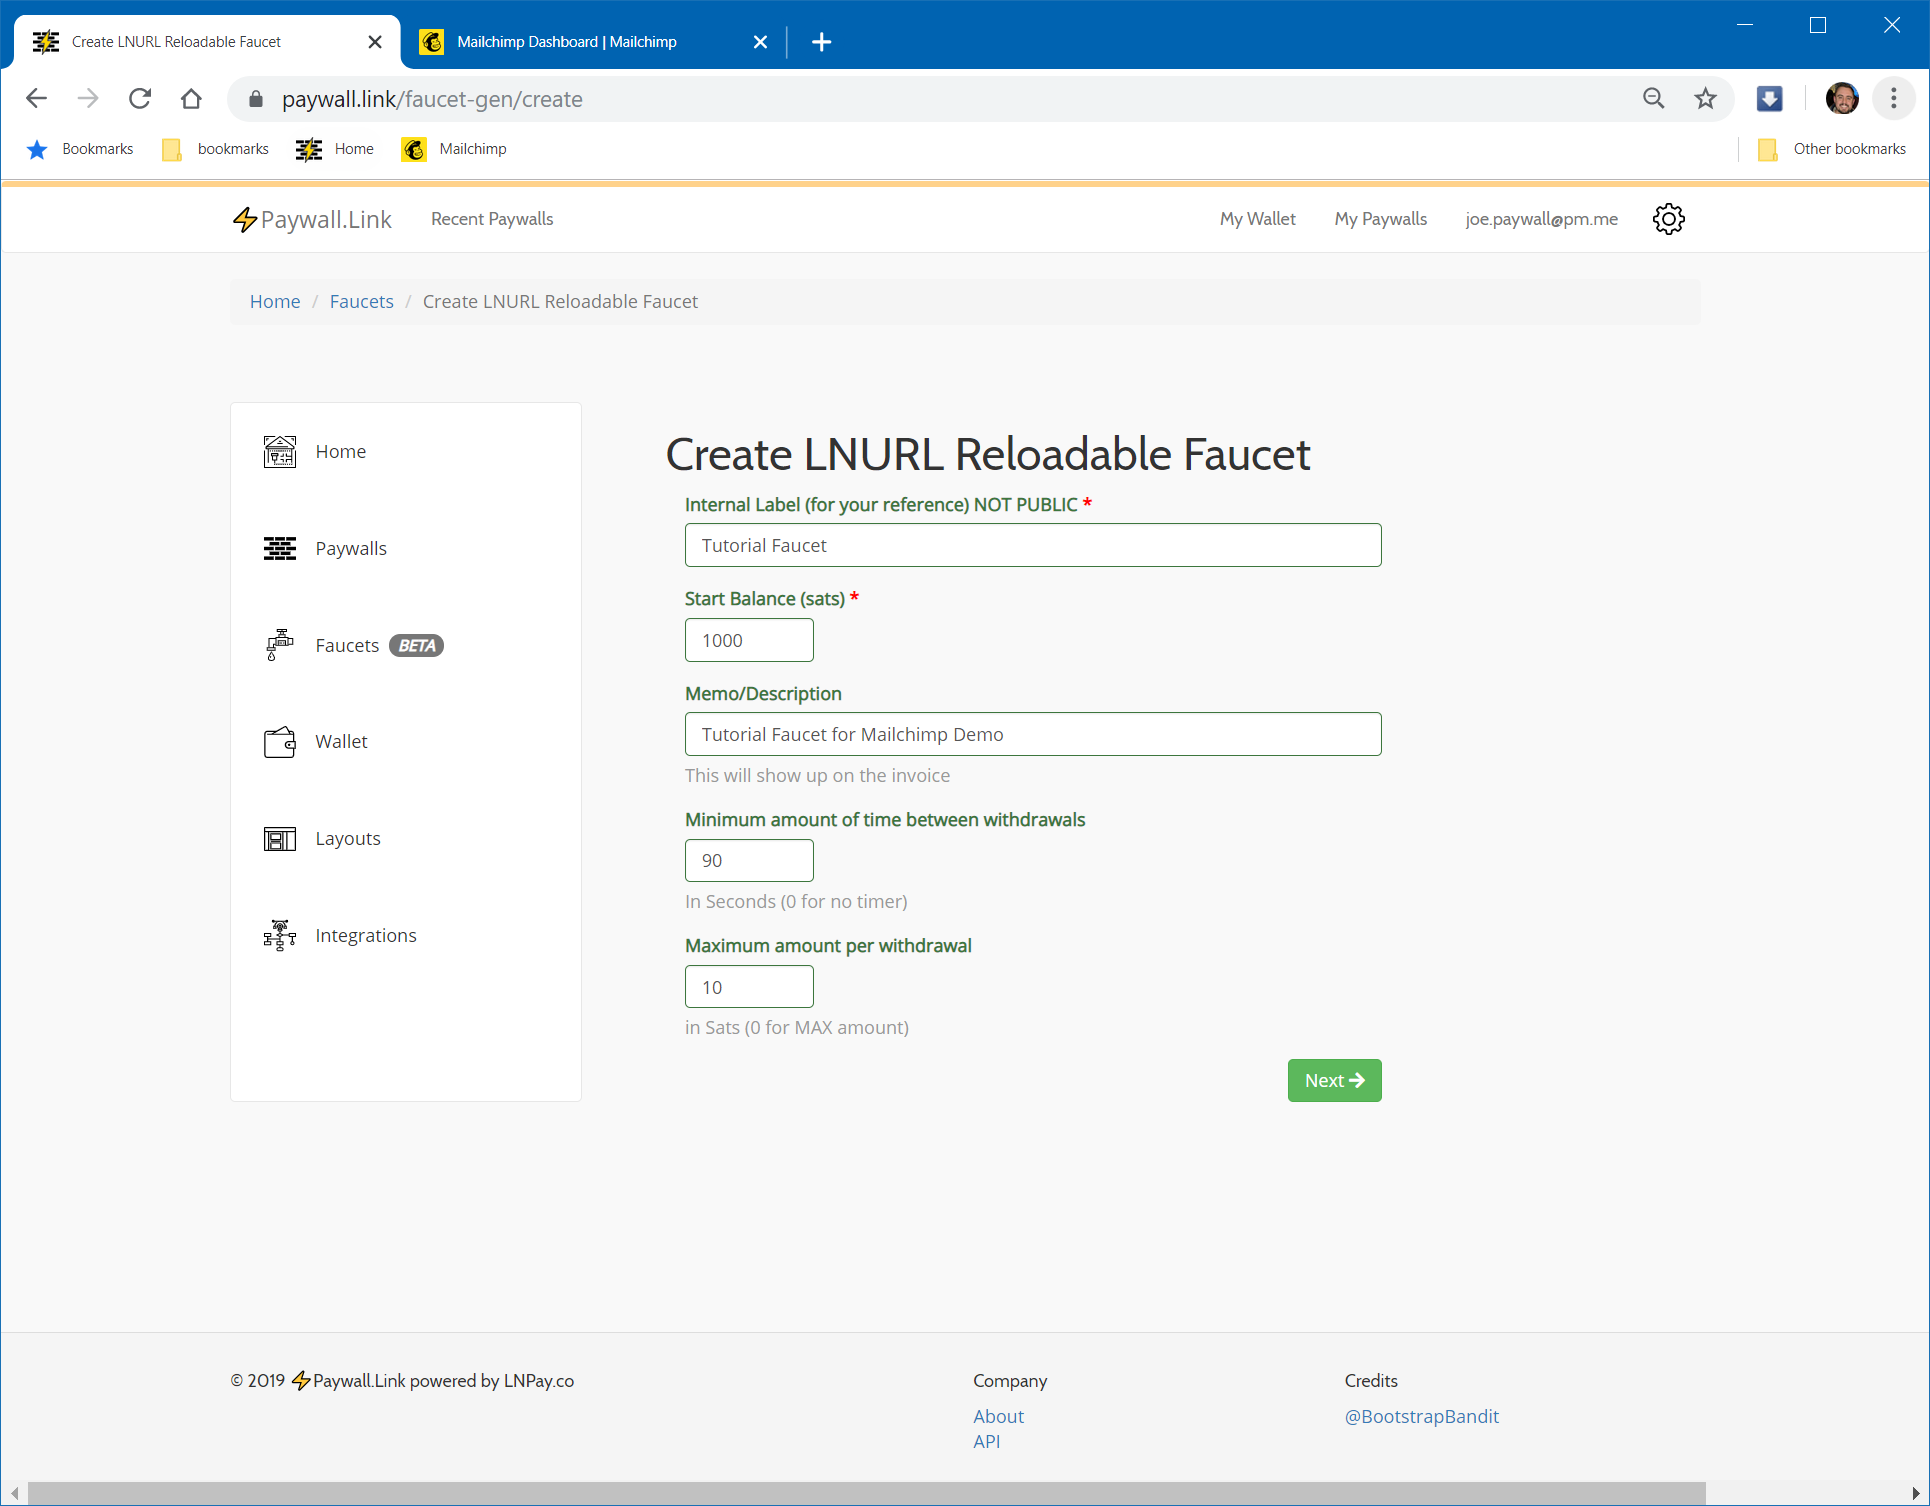
From here, you’ll need to fill out the required fields.
Please Note there are advanced fields we will work with once you’ve completed these basics.
Now you’ve got to fund the wallet. You will need to use a lightning wallet to fund the account.
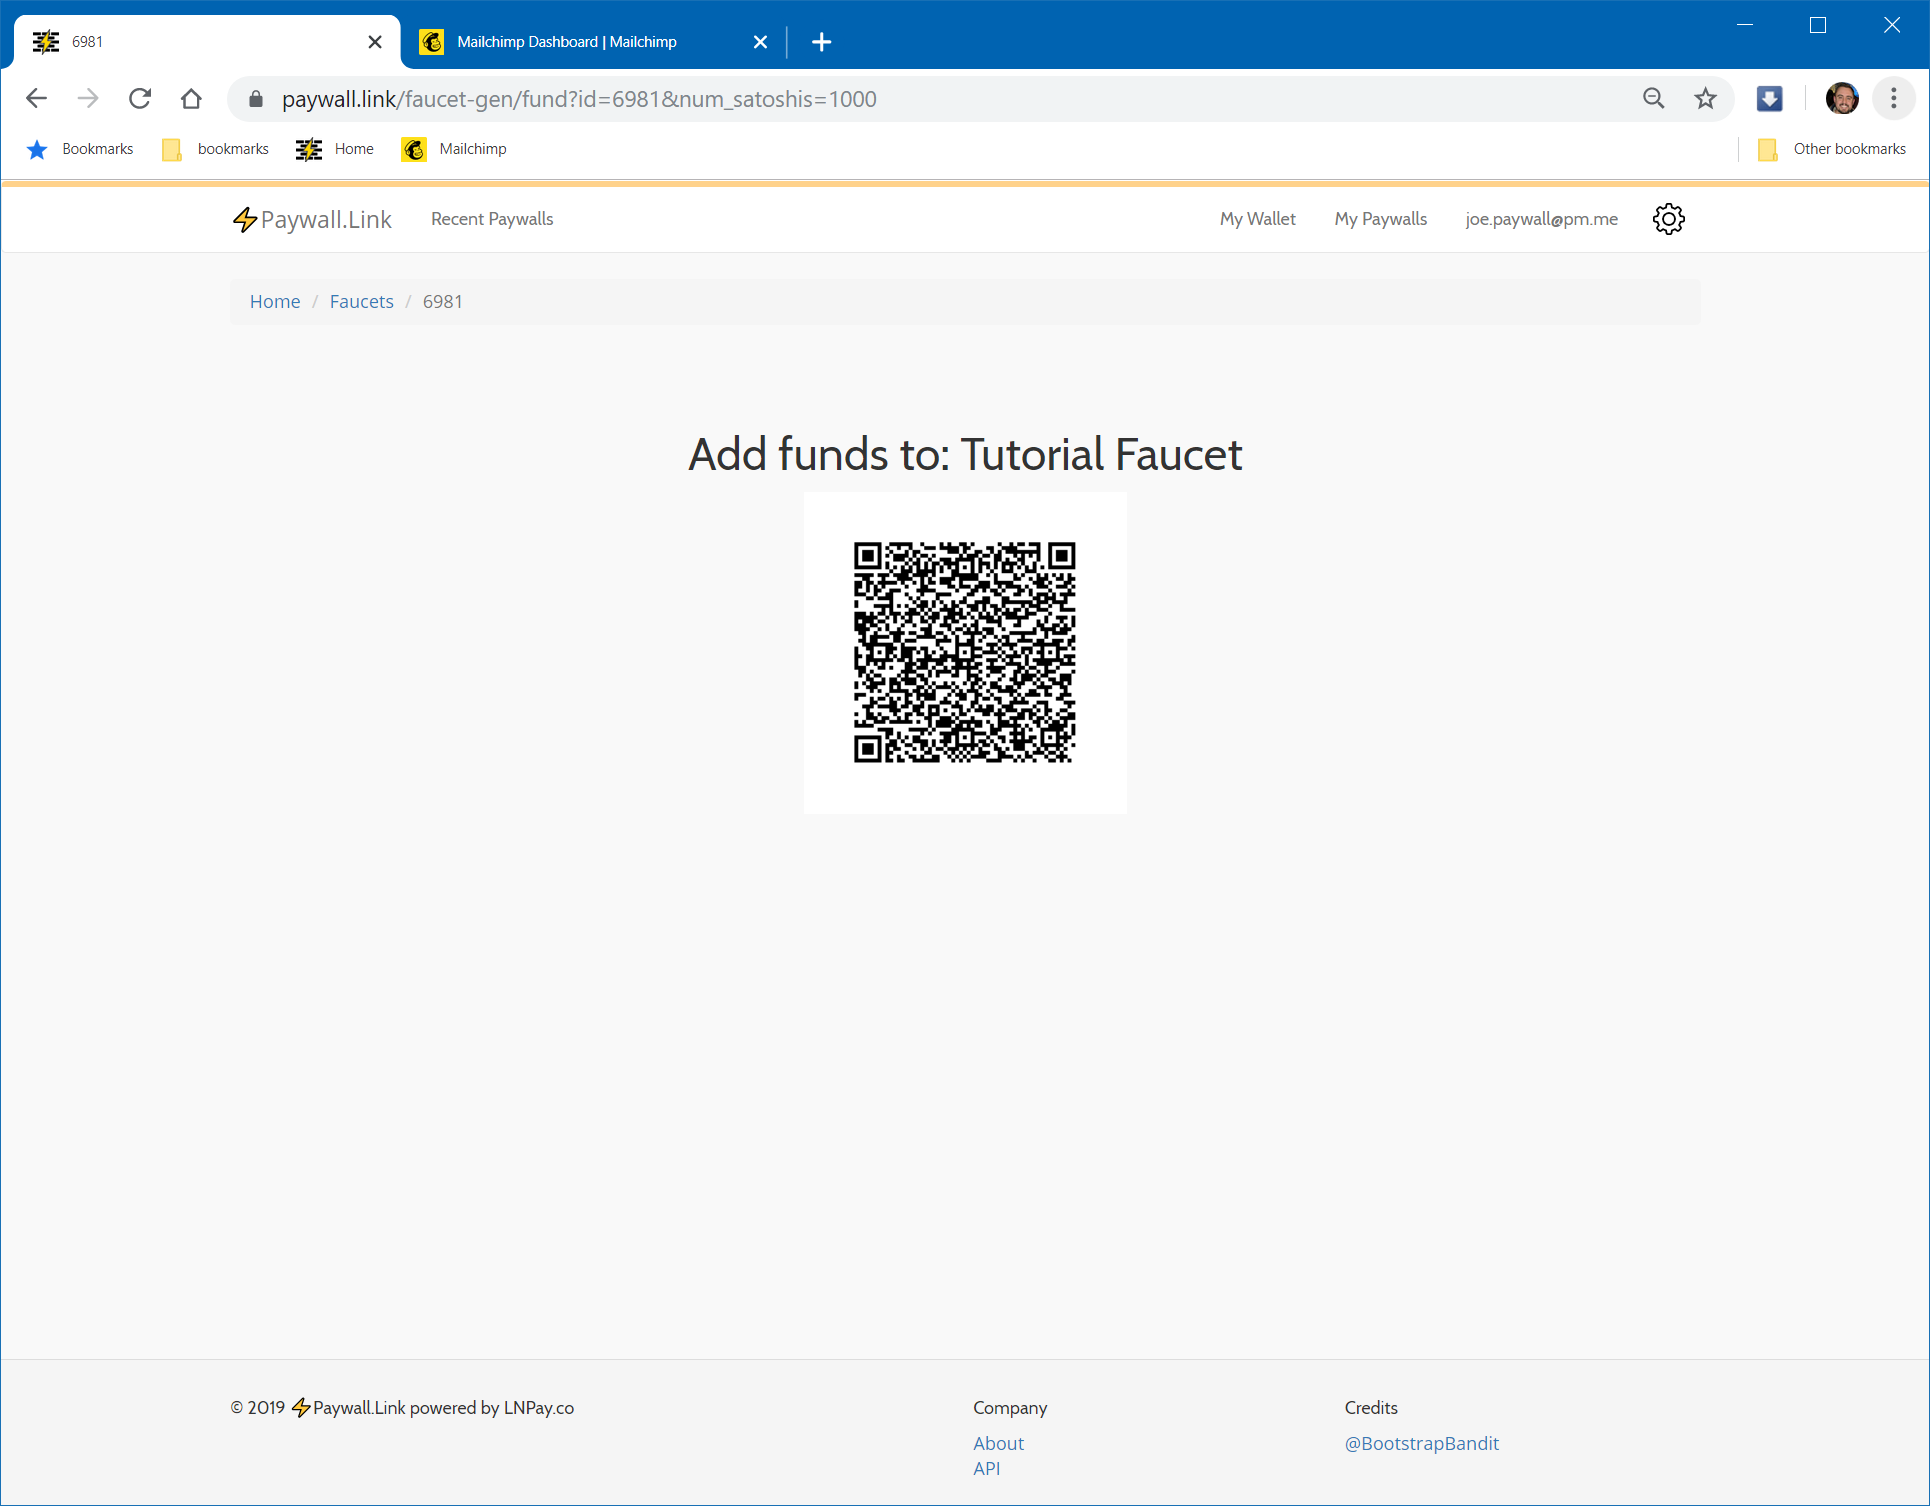
Once your wallet is funded, the page will automatically redirect to the advanced settings for the faucet.
The MODIFY button allows you to make changes to the settings you just filled out when originally making the paywall, the memo, timer, max sat withdrawal, etc.
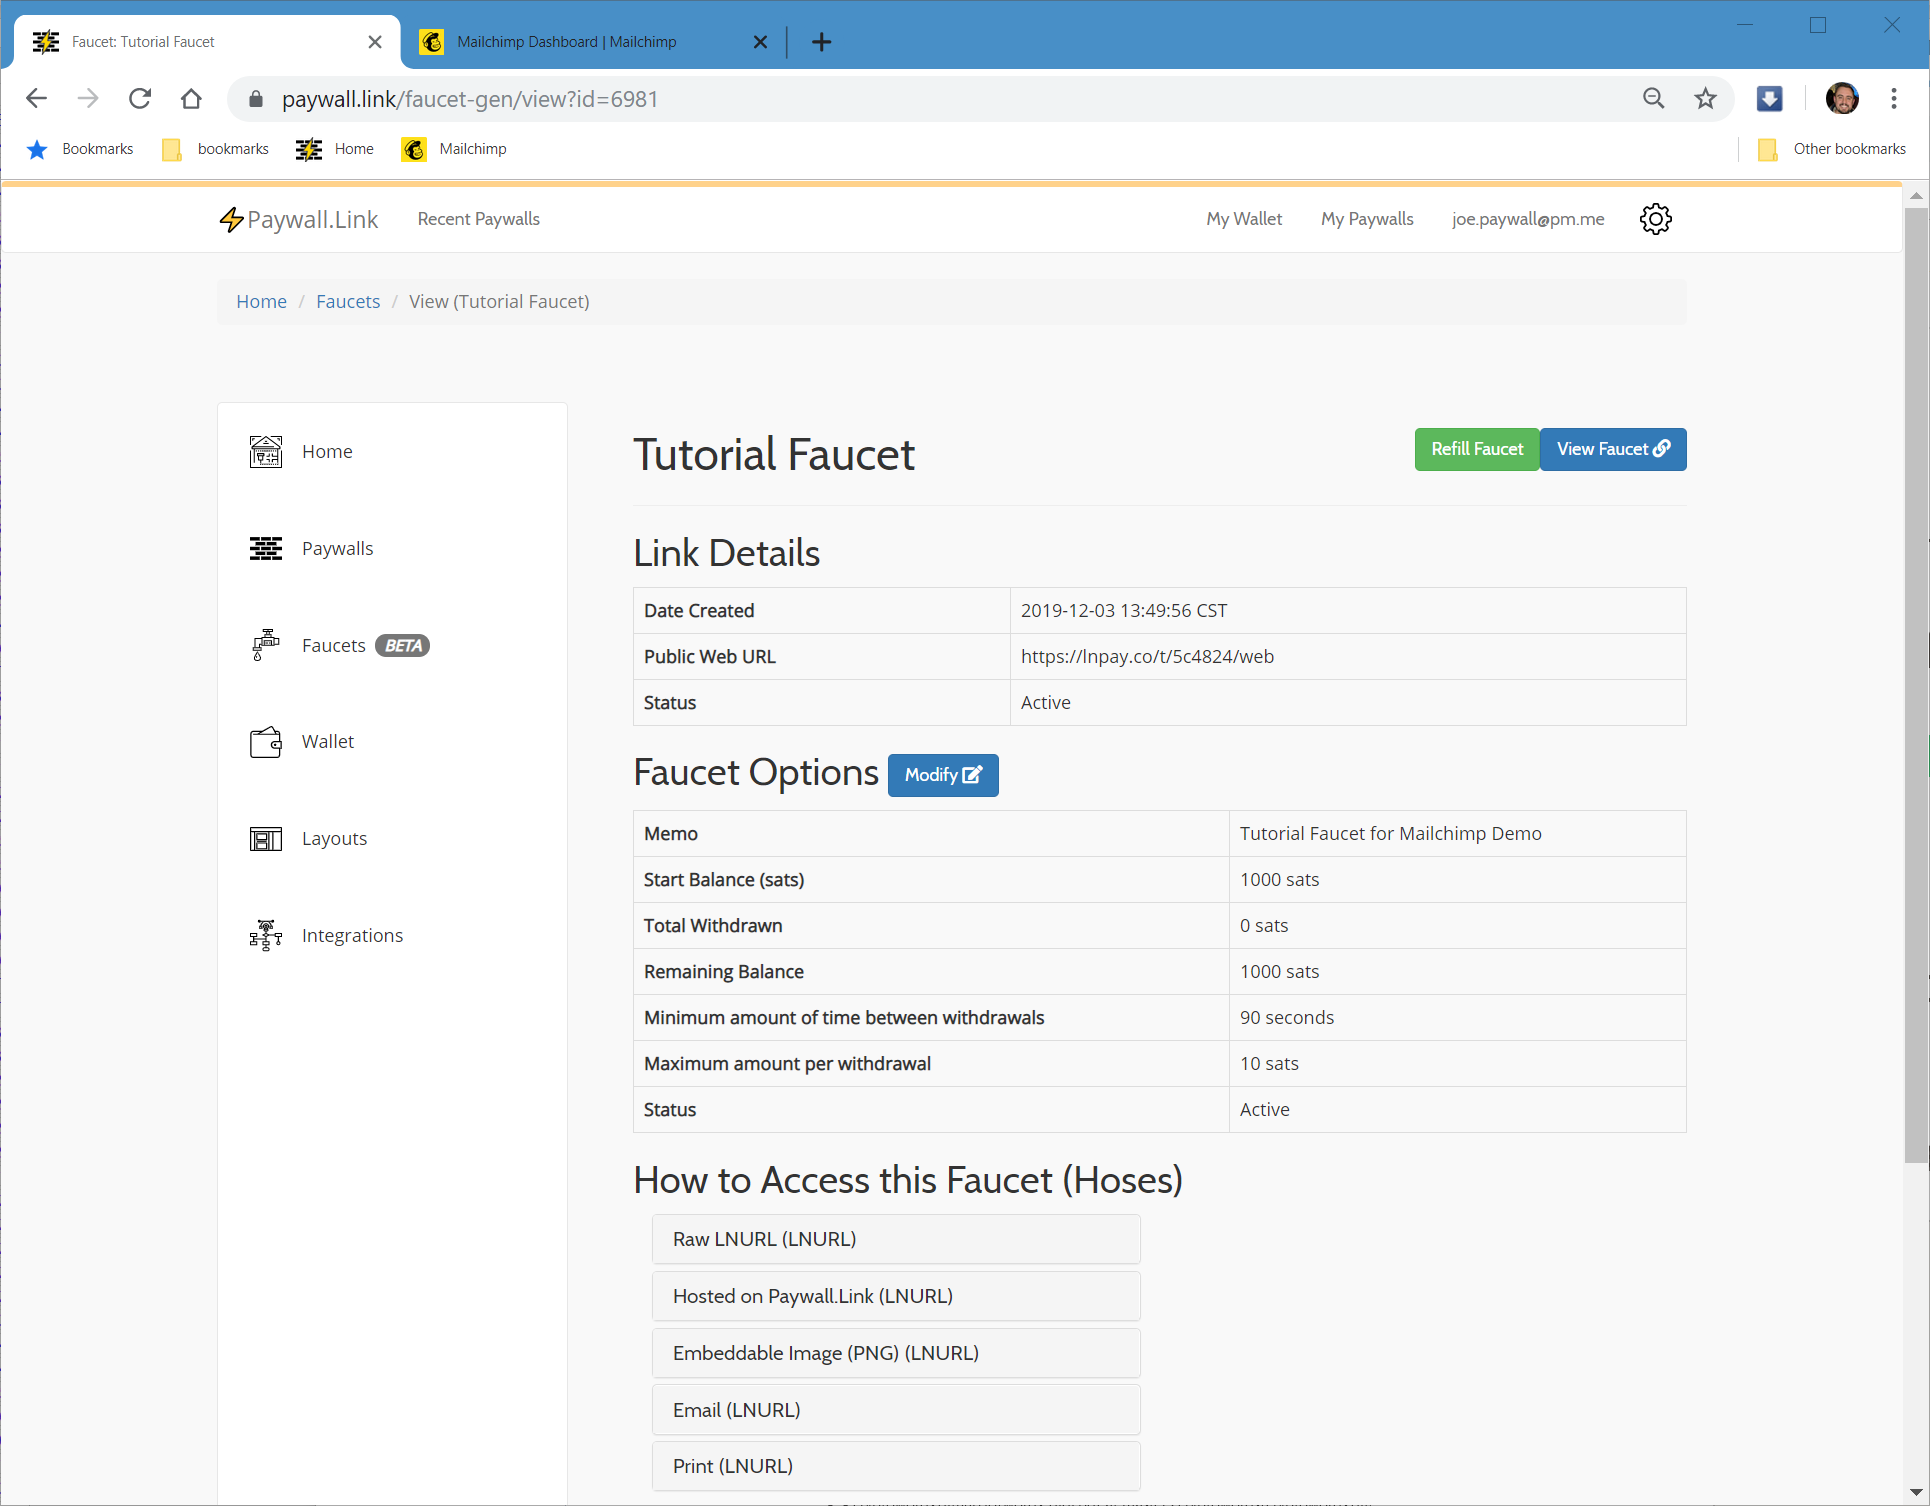
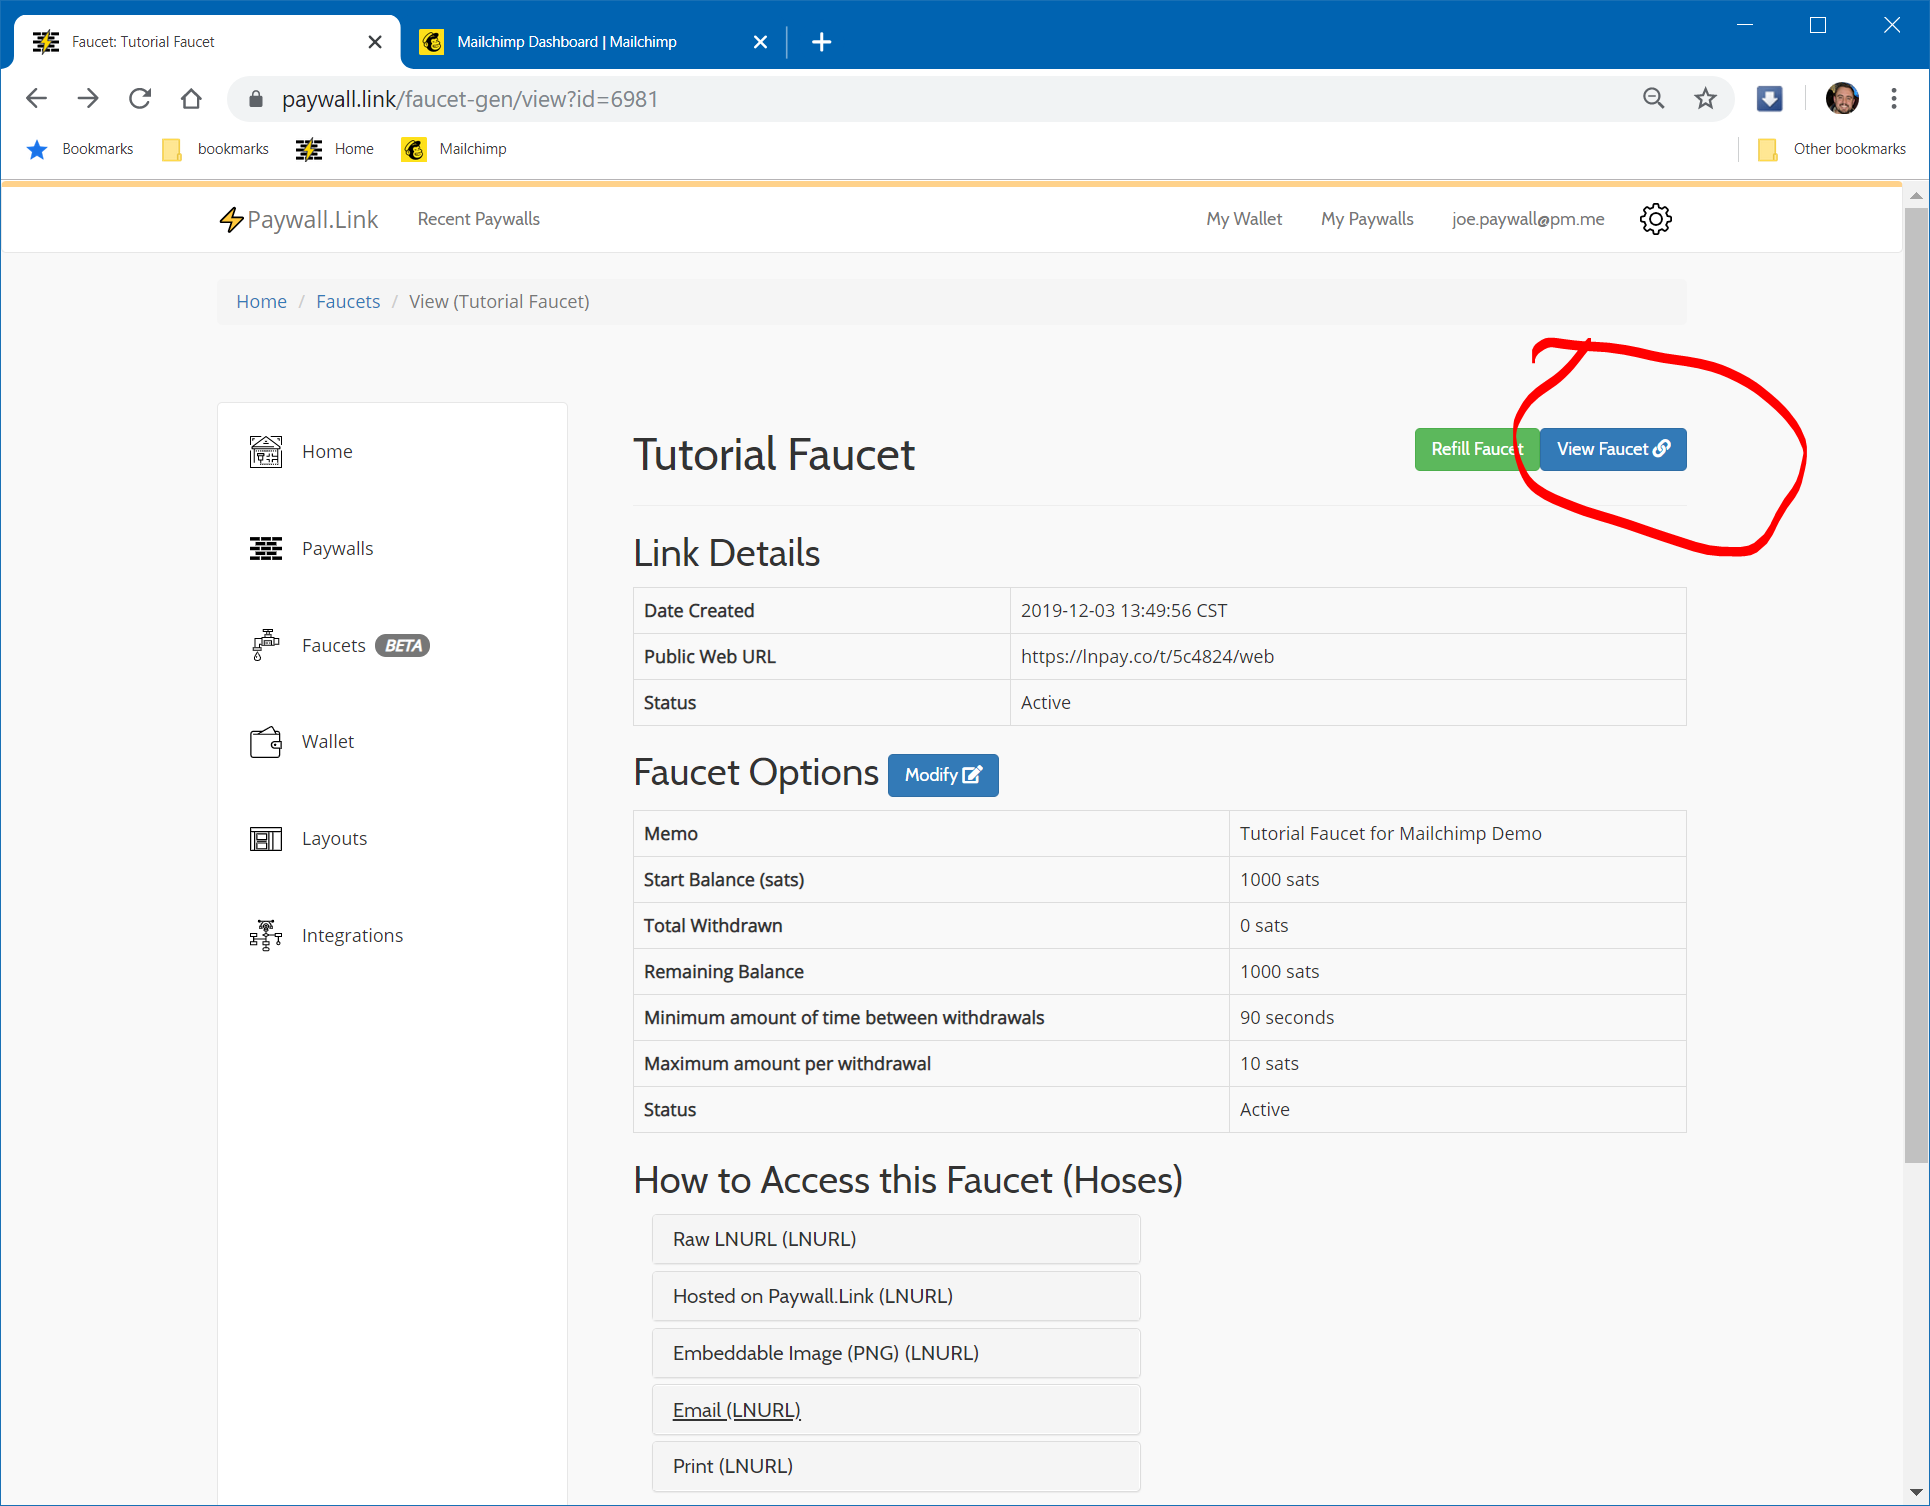
If you click the View Faucet Button, you will be taken to a hosted faucet.
IMPORTANT anyone who has this URL will be able to withdraw funds from the faucet, unless it’s disabled. We will NOT be using this URL in our demo, rather an embeddable image.
Setup Mailchimp campaign
Head over to mailchimp and get your first email campaign setup.
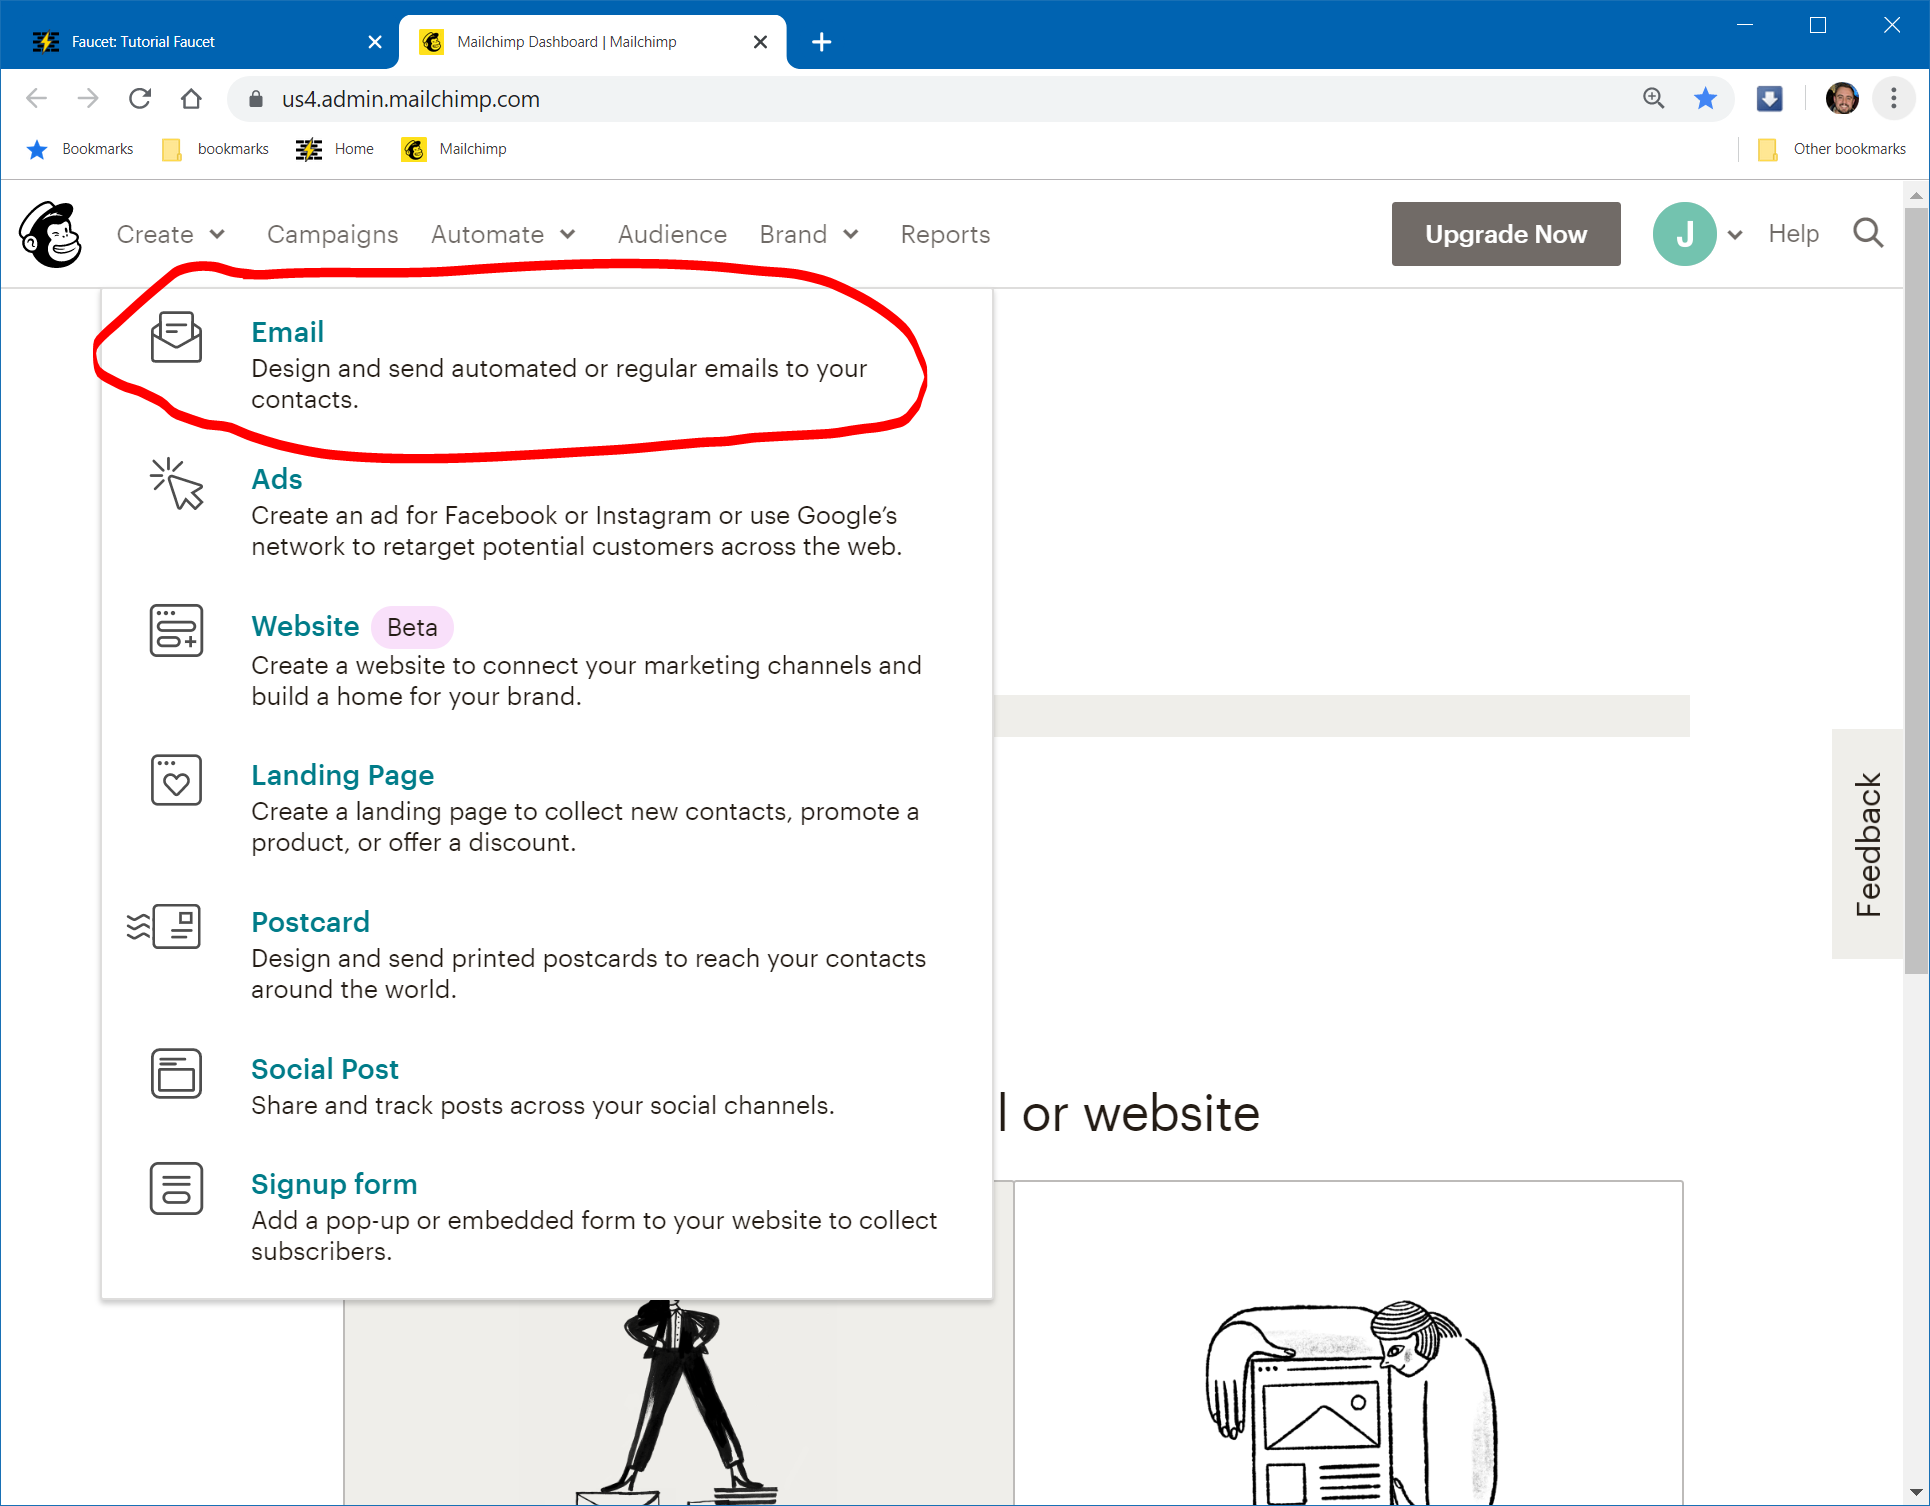
You will need to fill out the required fields…
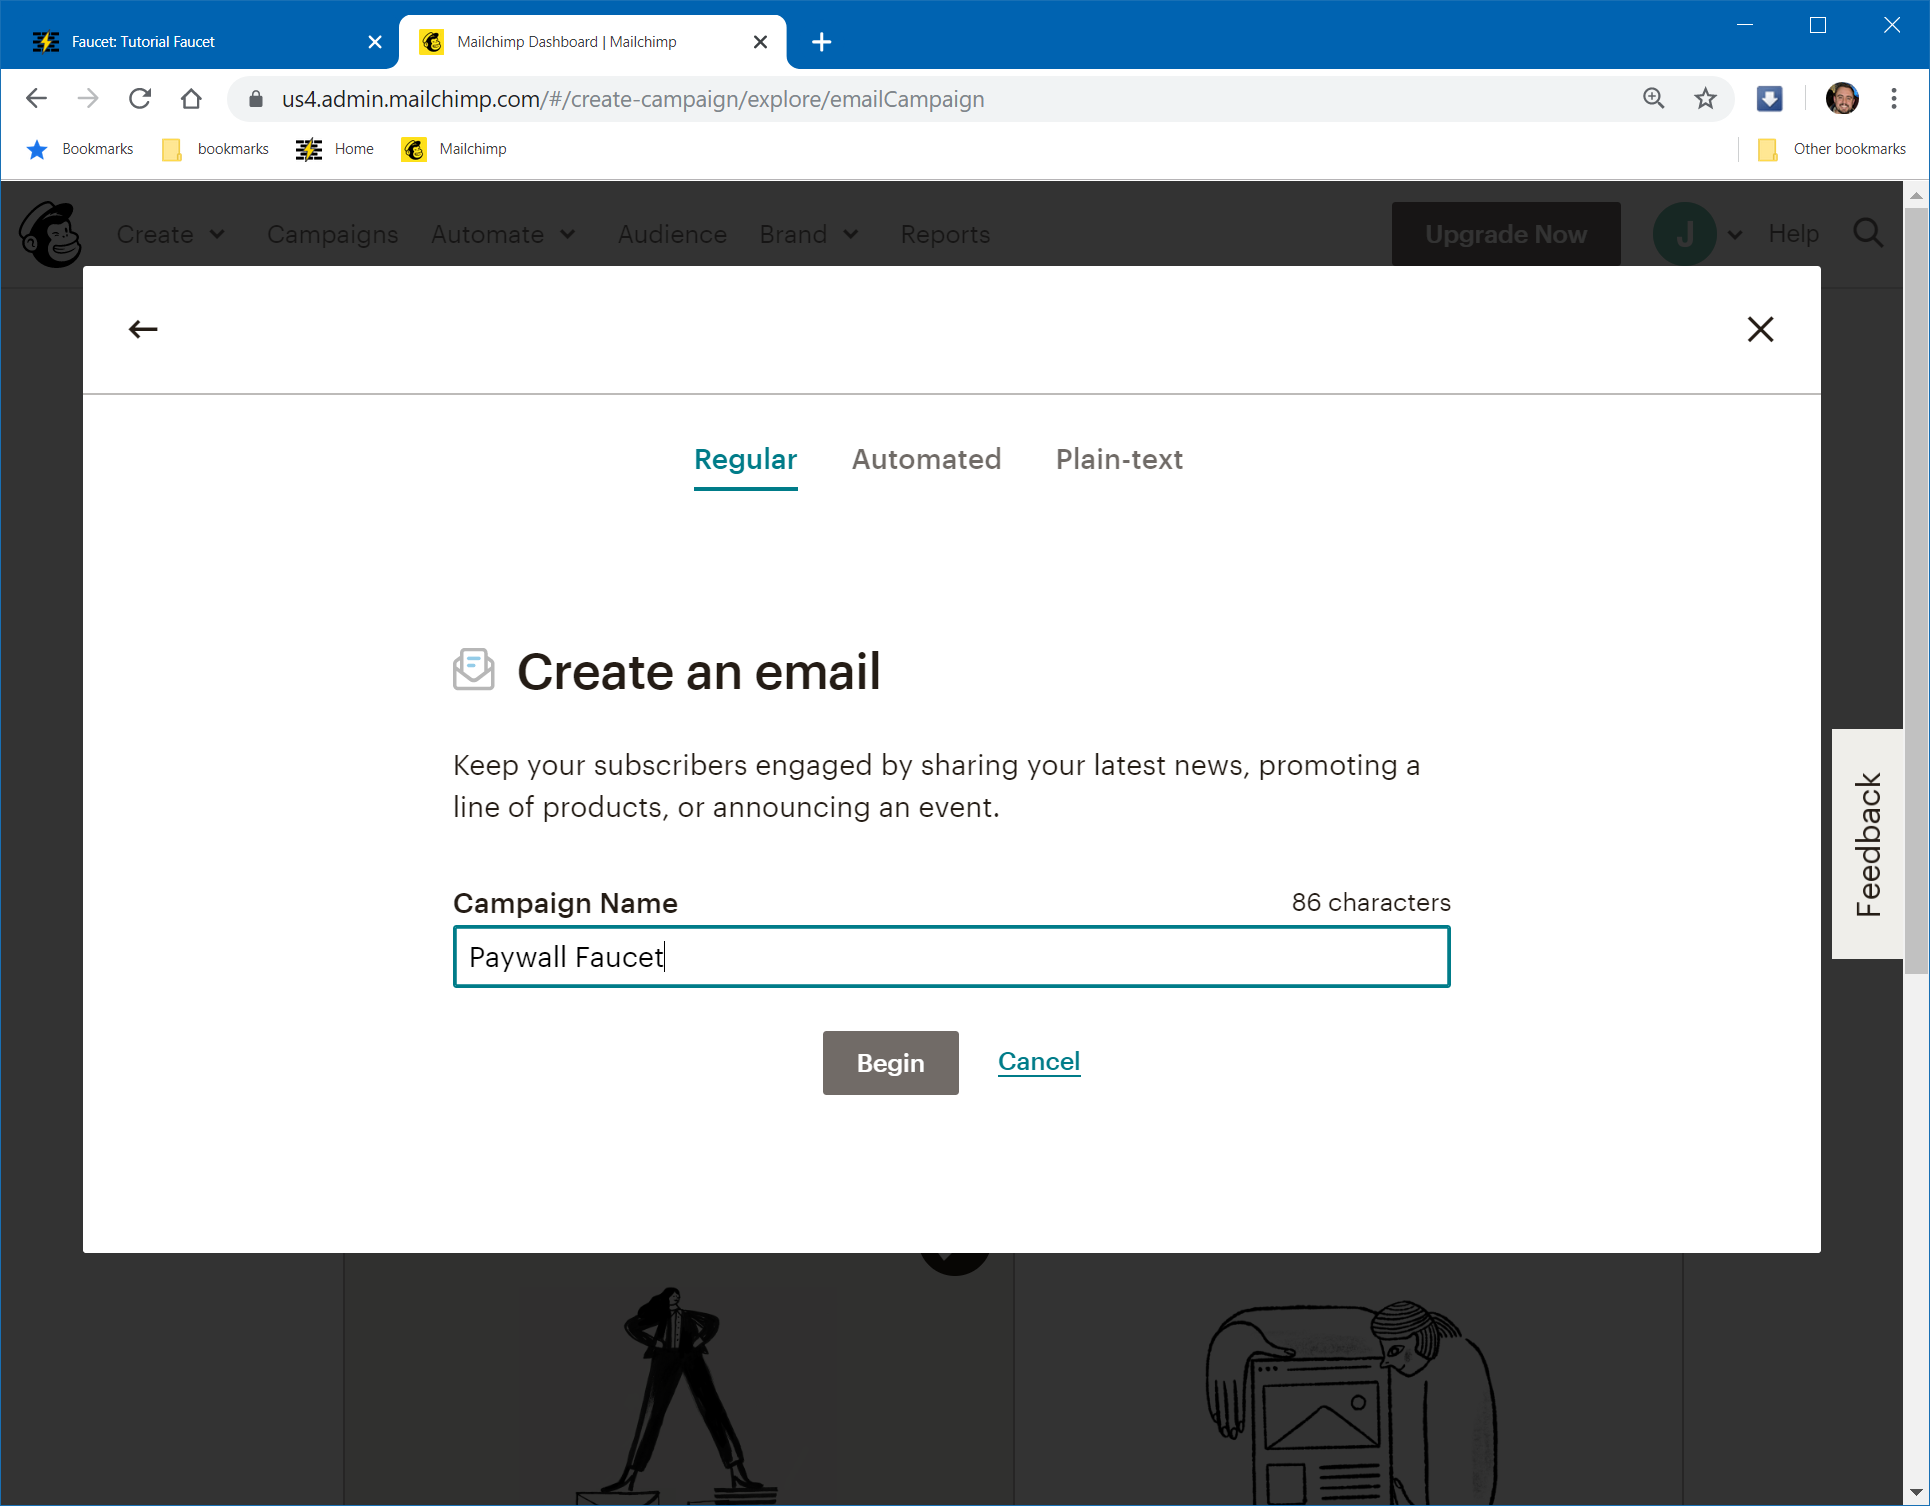
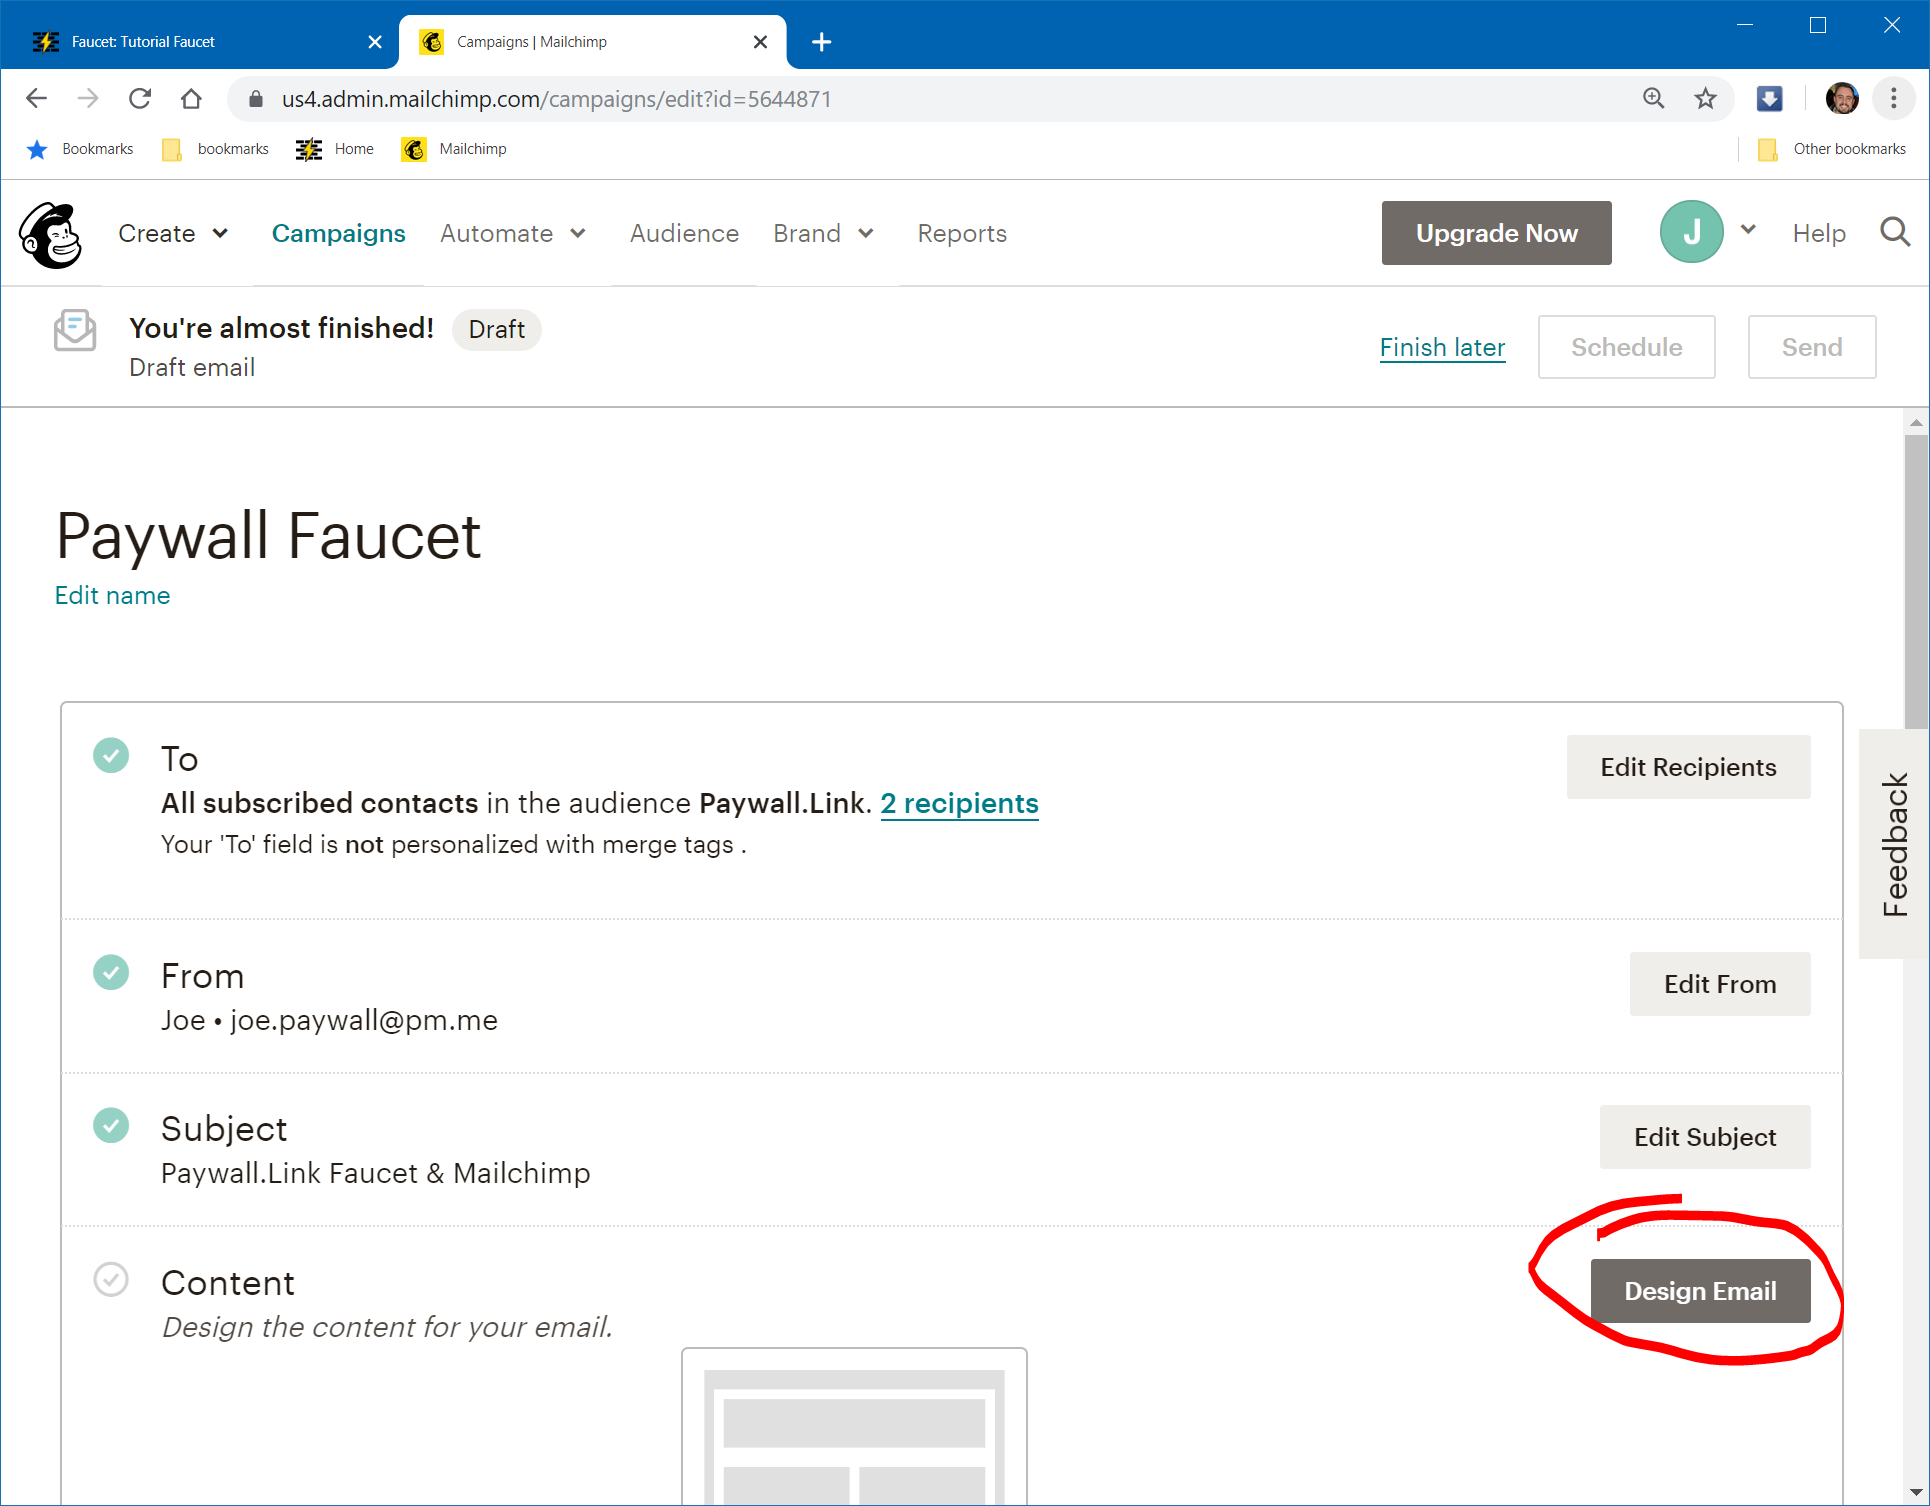
Once you’ve added your desired audience, who it’s from, and the subject line, the only thing left to do is design the email!
You can add subscribers manually under the audience tab on the home page
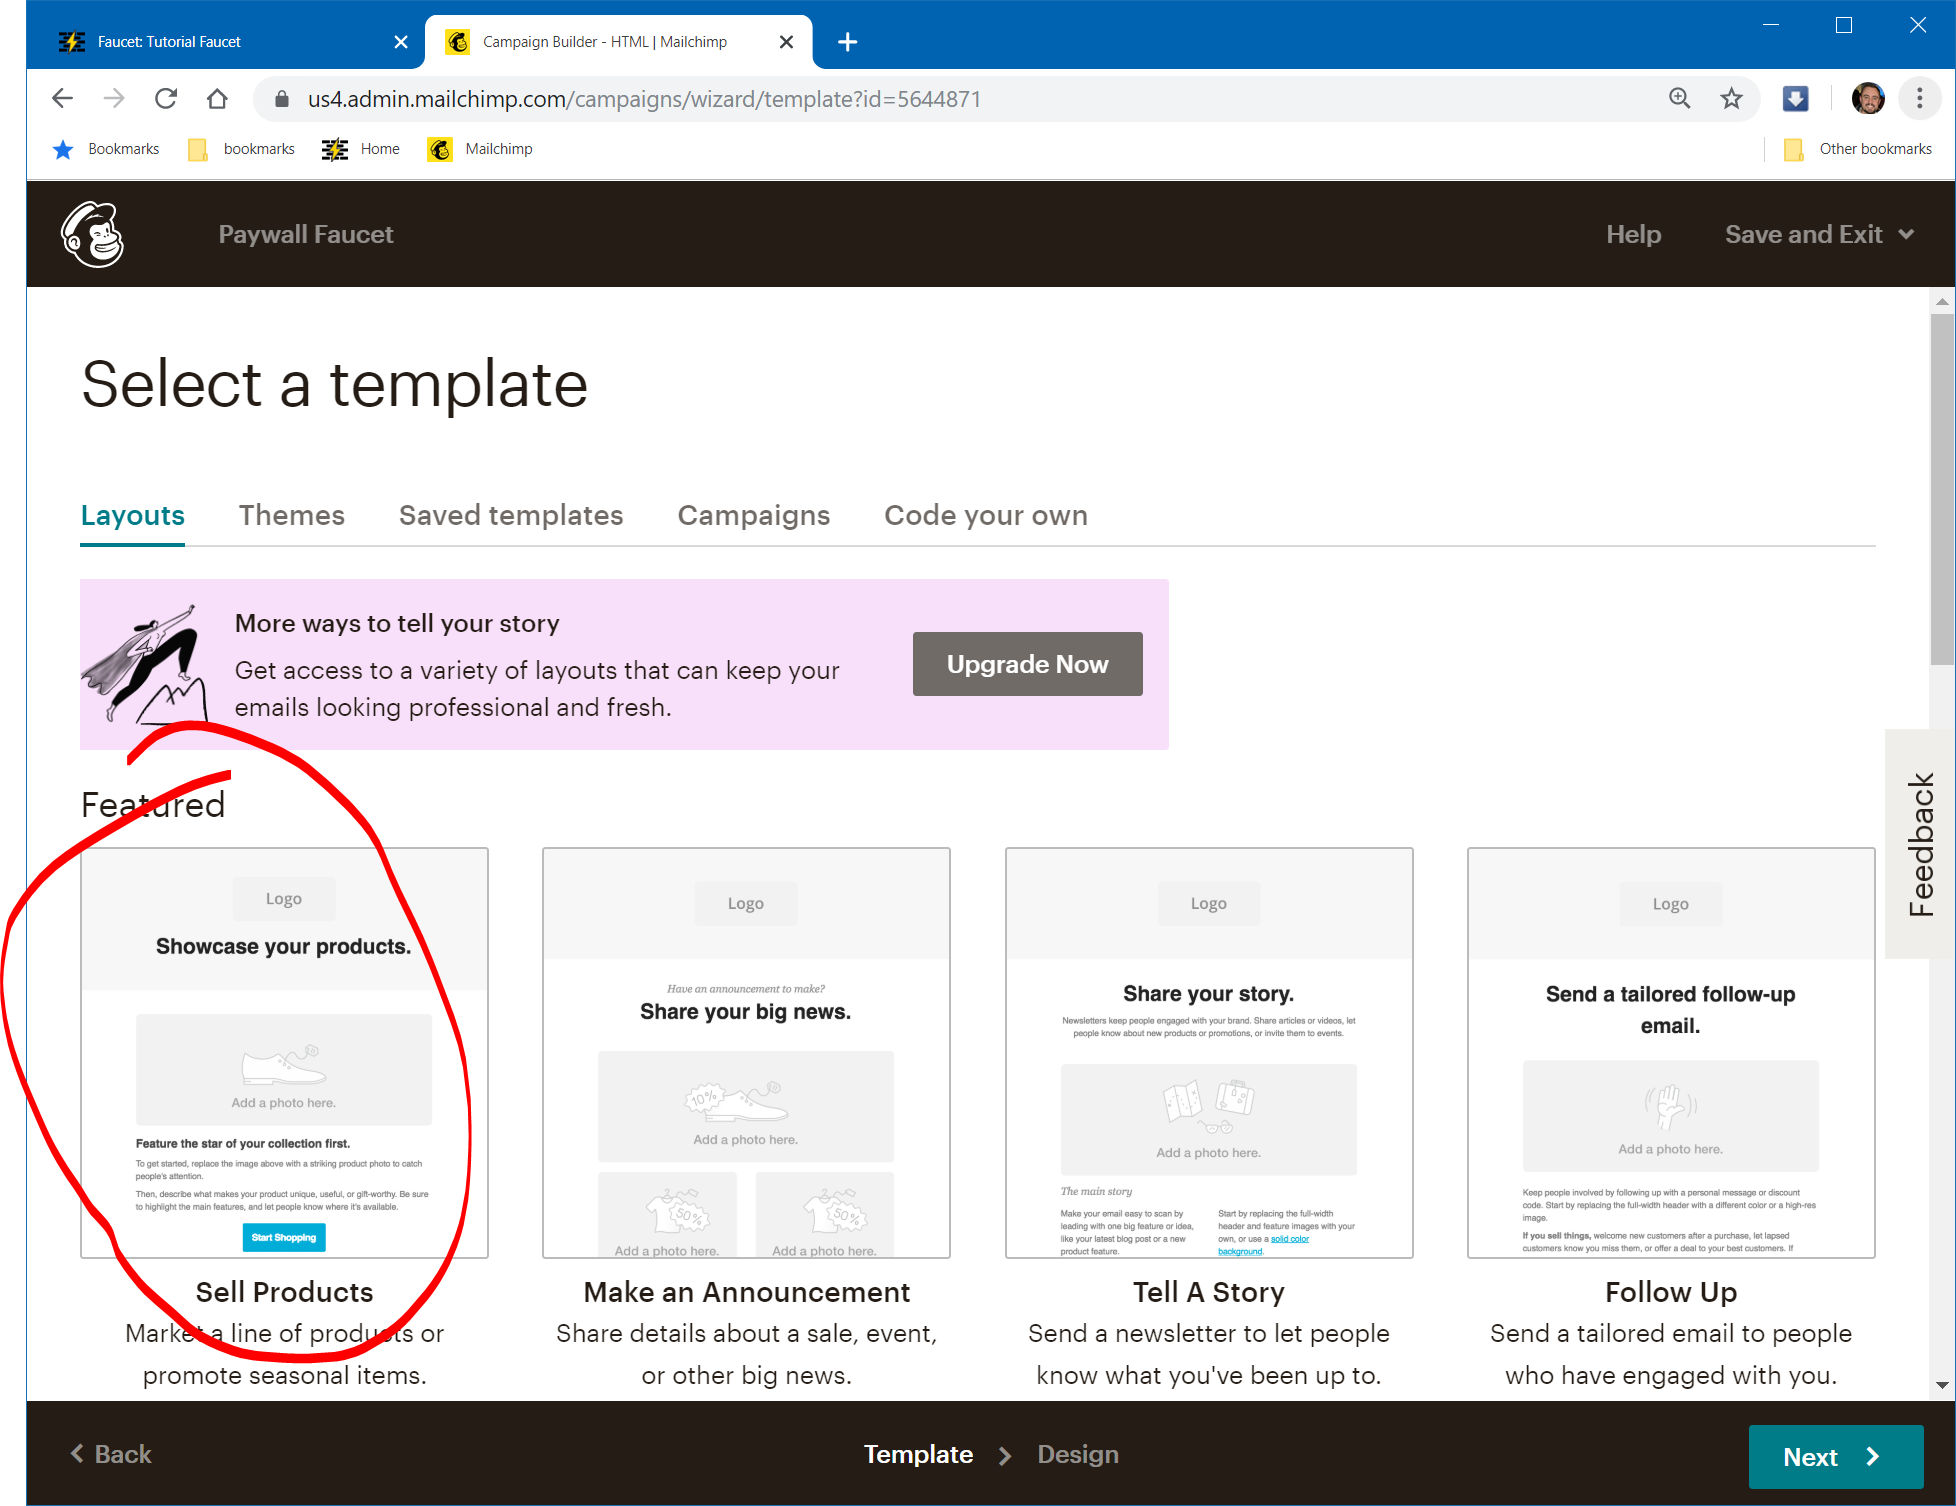
We’re going to go with the first option in the layouts section of the email tool…
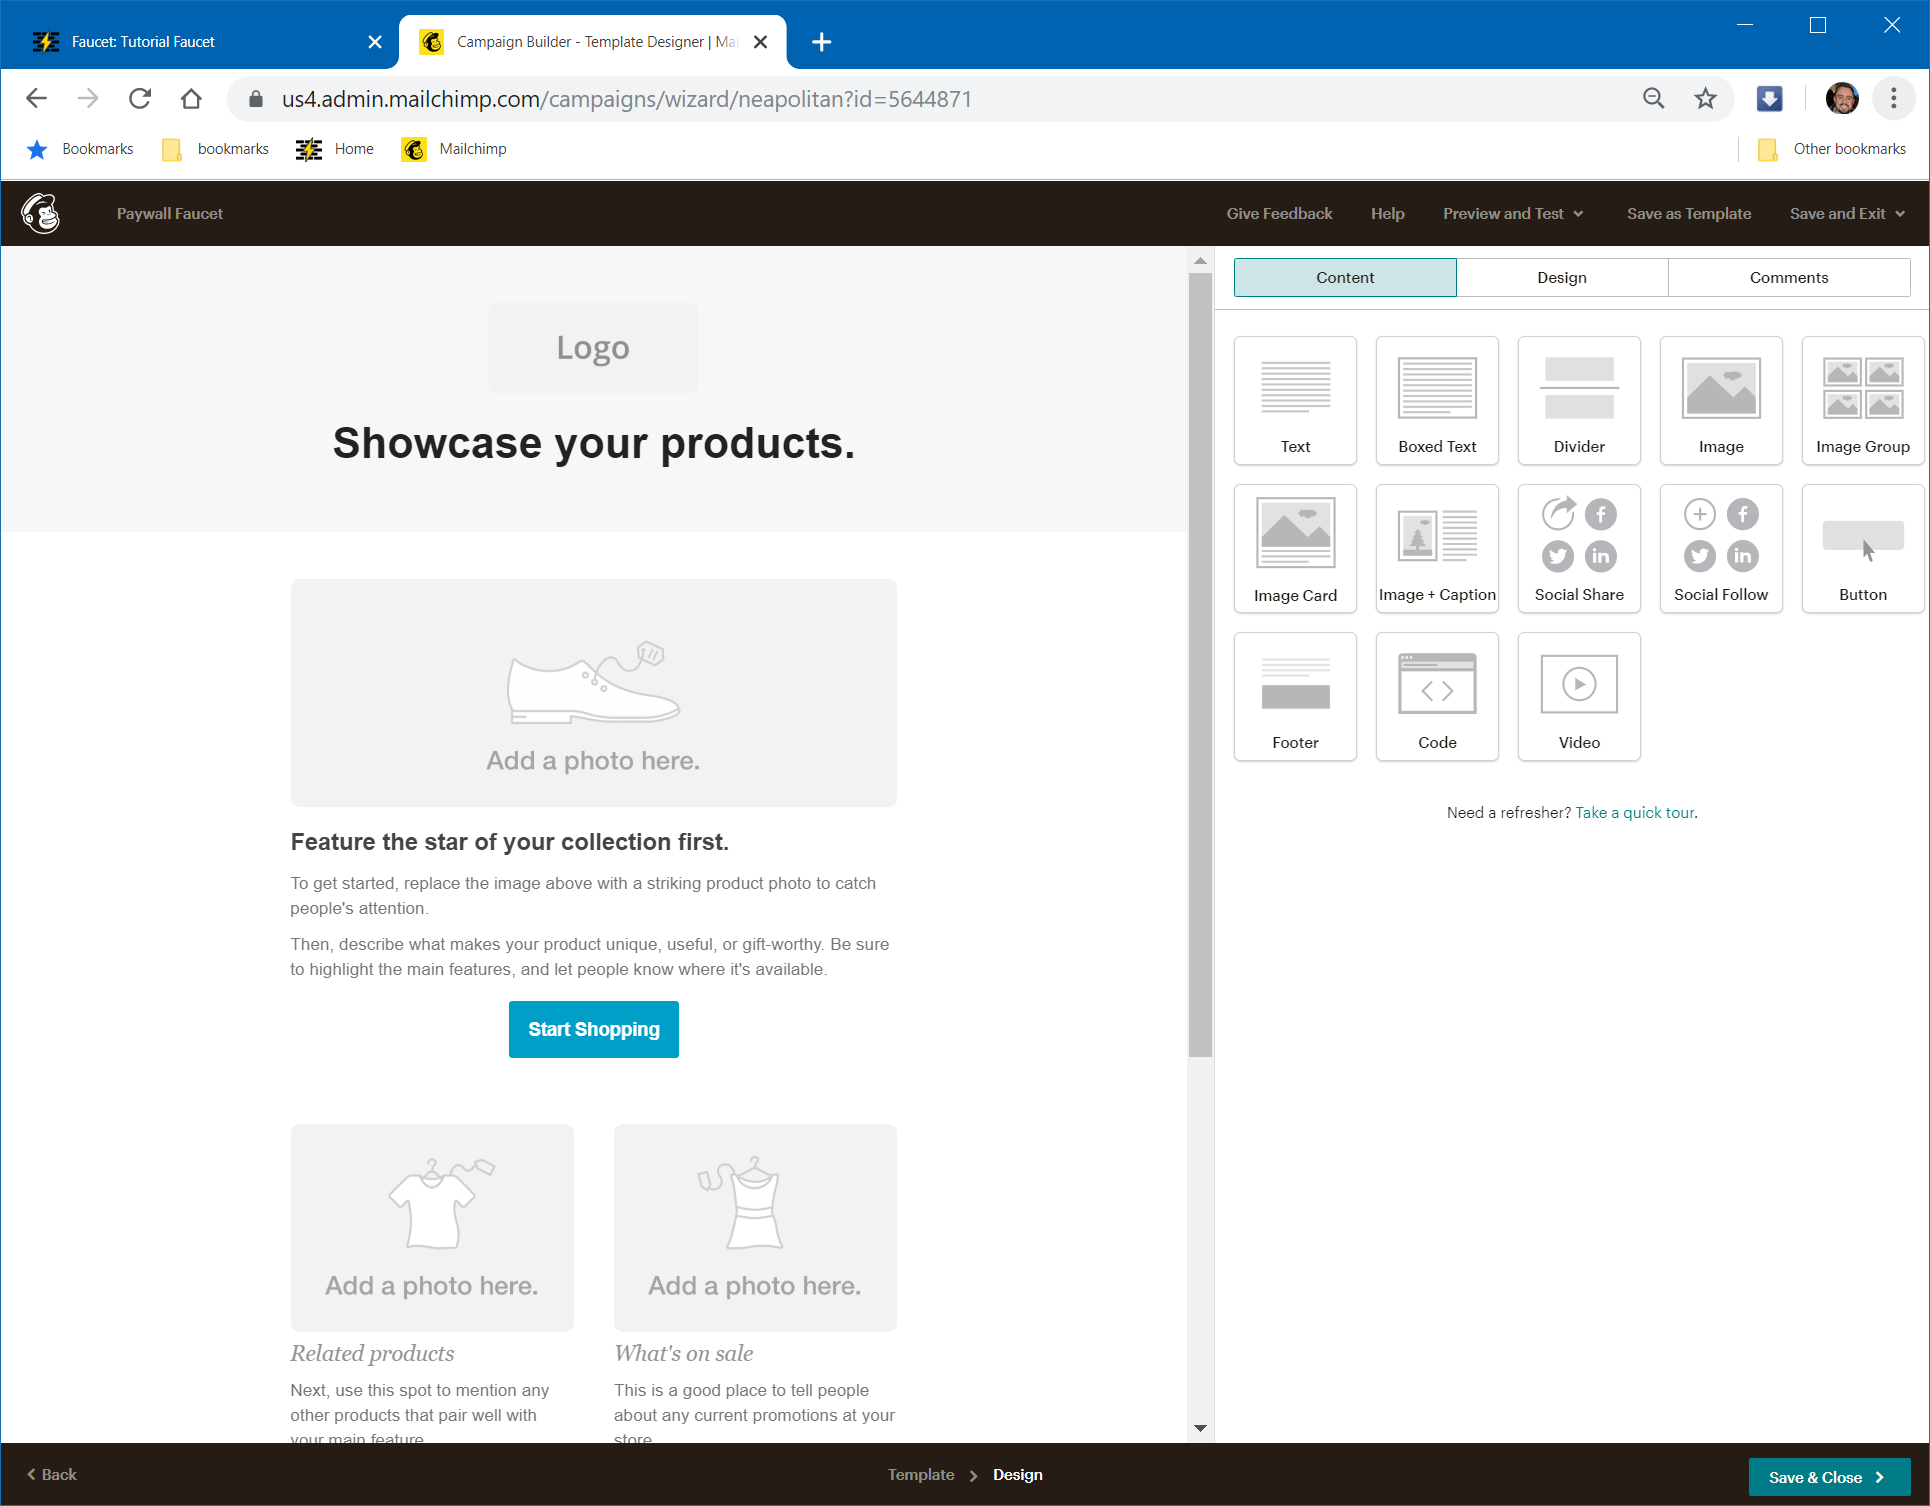
This is what a blank theme looks like. We’ll style it up very basic for the purpose of this tutorial.
Mailchimp is pretty straight forward. You can drag and drop blocks of content (displayed on the right) to quickly customize your newsletter.
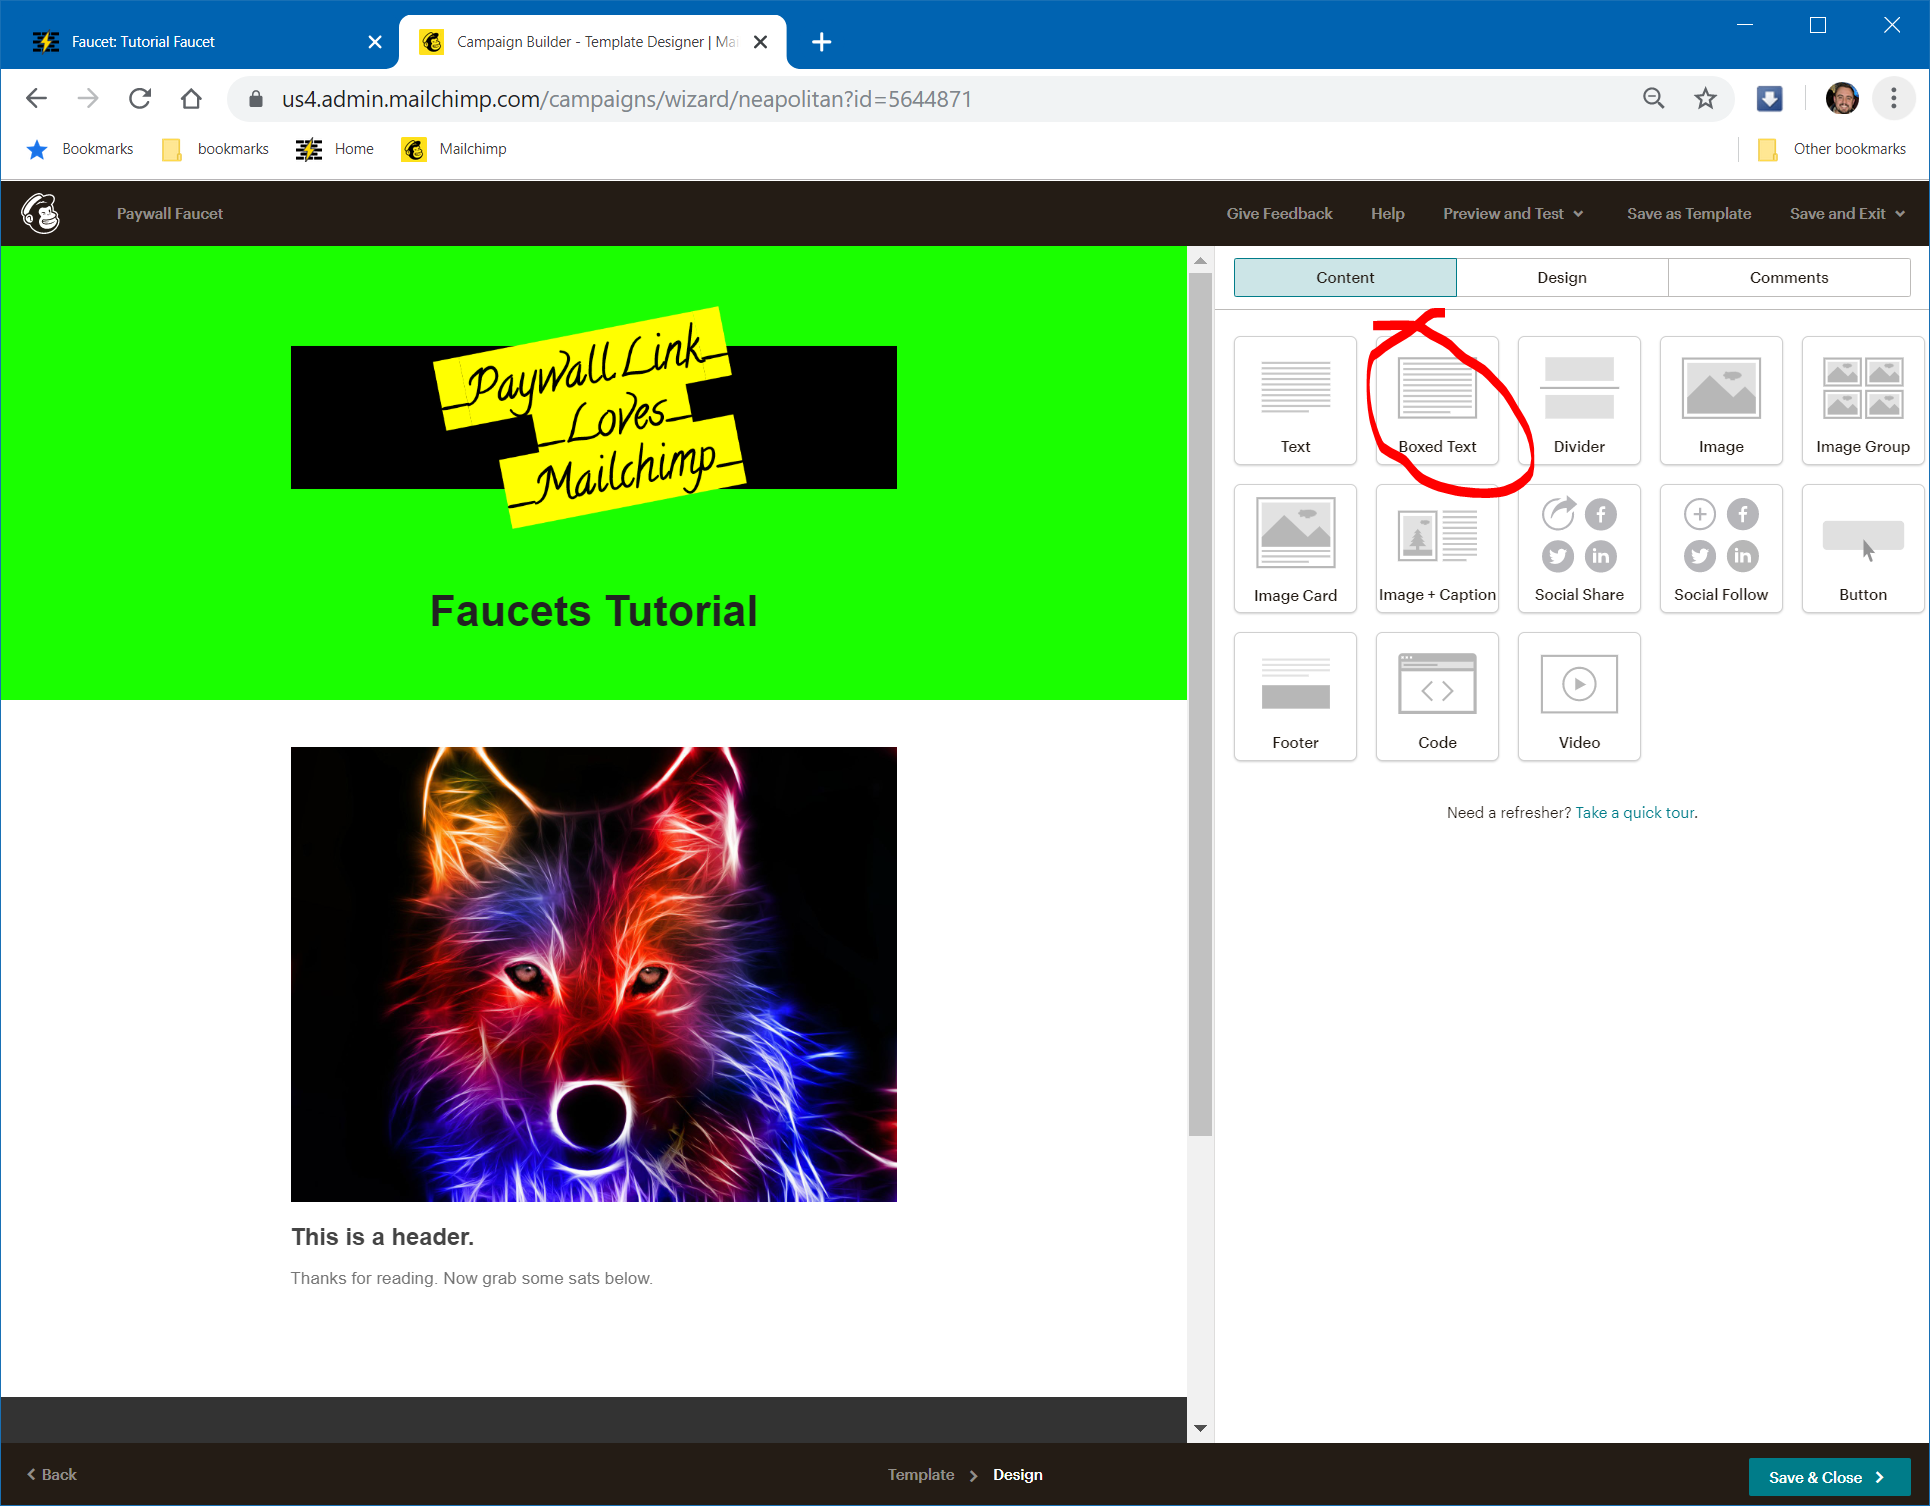
I’ll add some color to give you an idea of what’s possible.
Spend a little time with this tool and you’ll be customizing in no time!
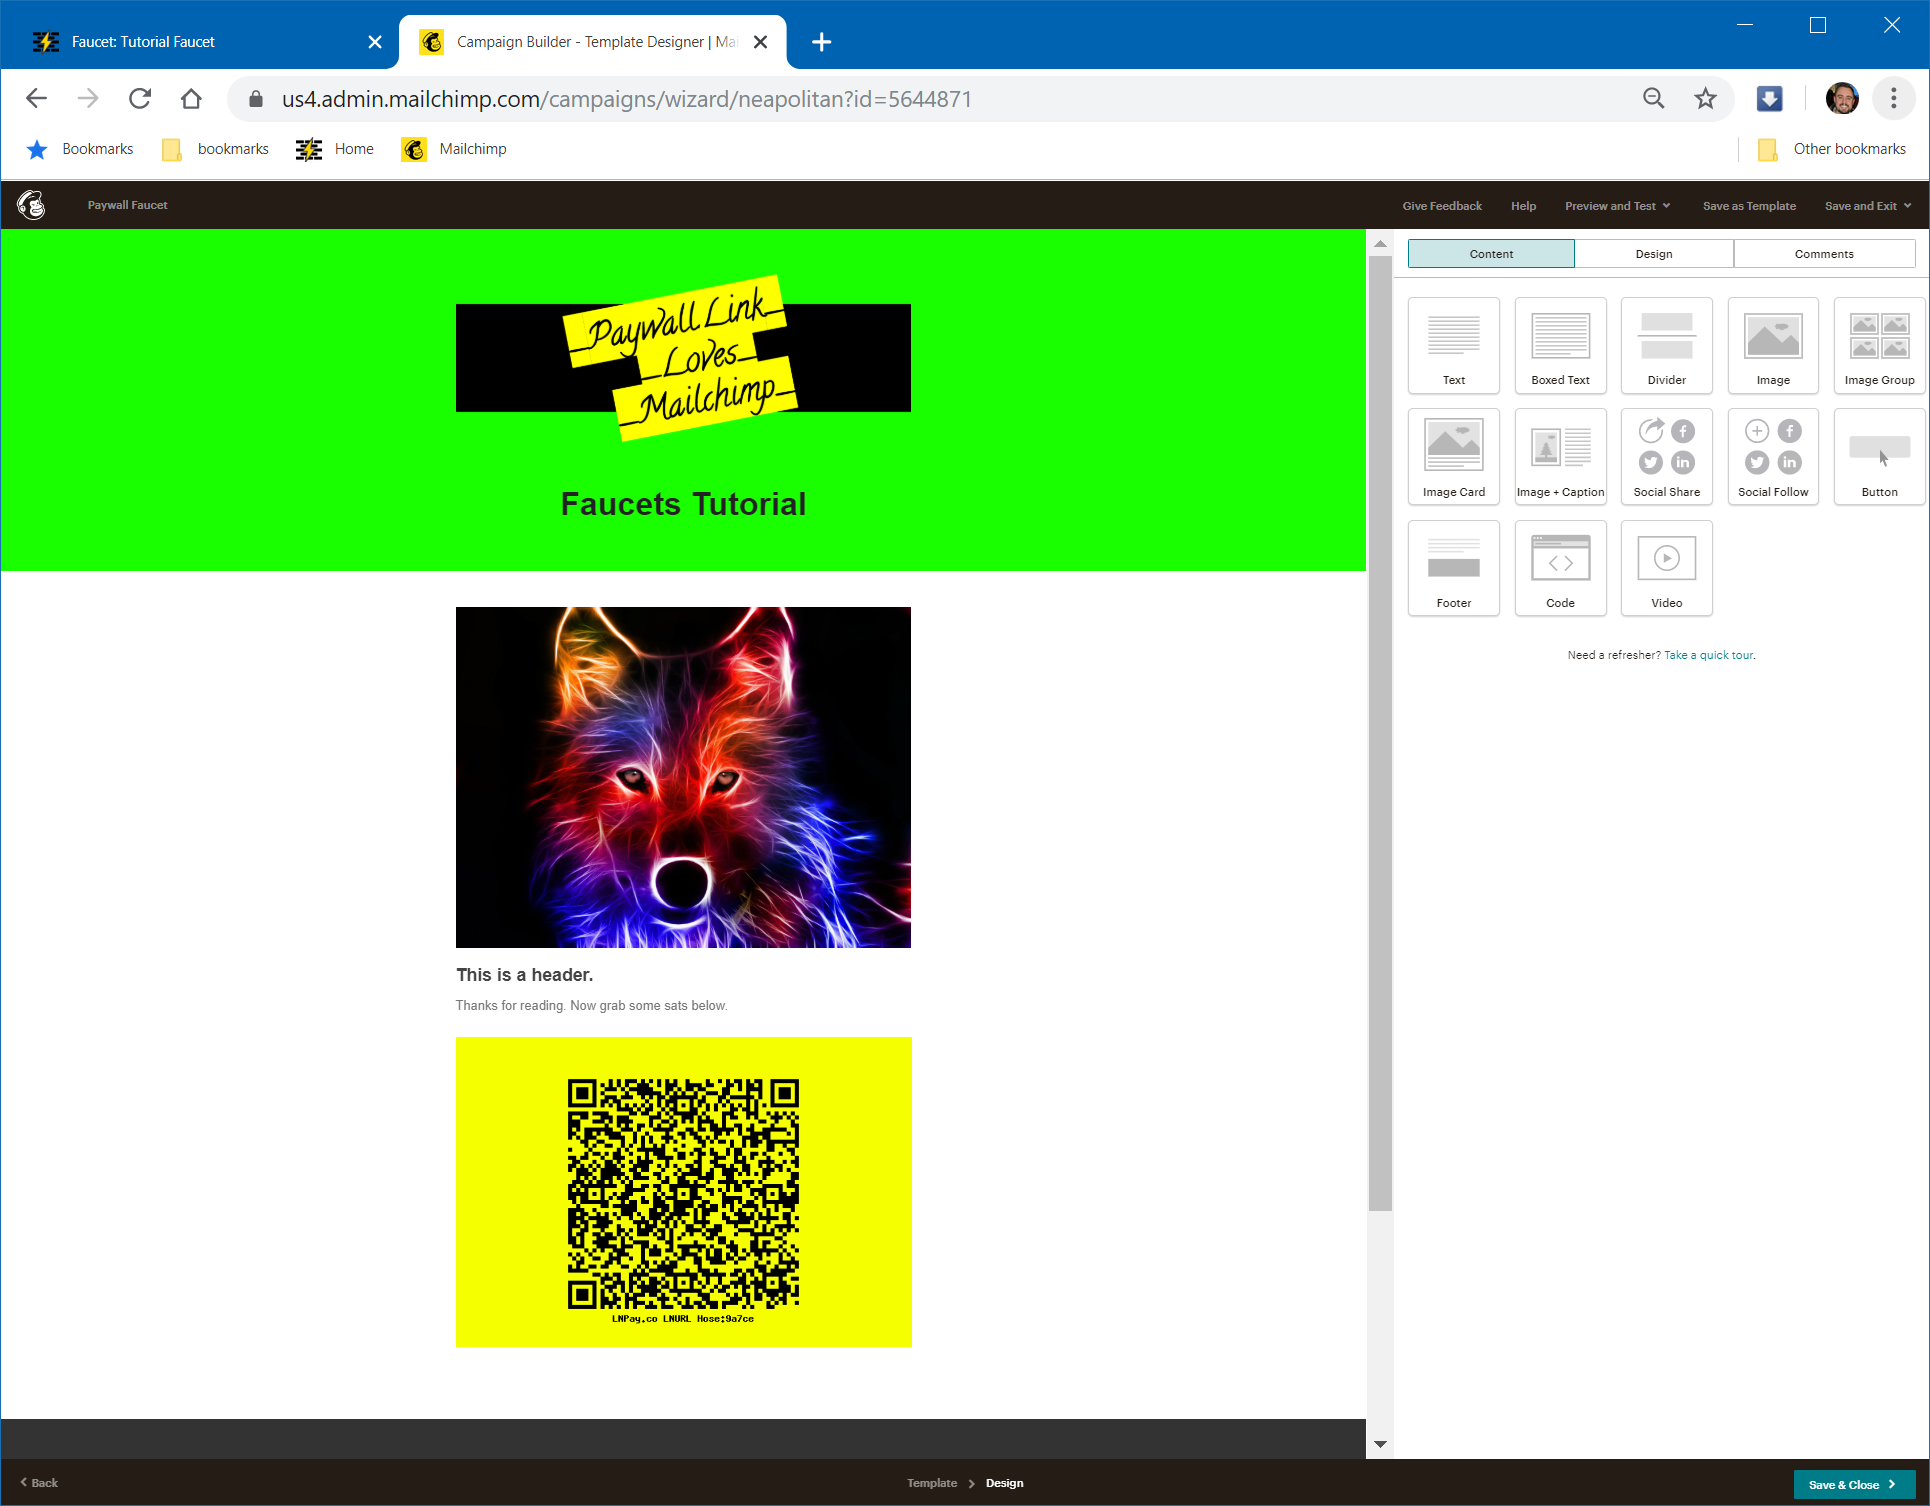
Now it’s time to add the faucet!
We’ll be embedding an image of the faucet, rather than a hyperlink to the faucet page.
The reason for this is so the internet can’t share the URL to the faucet, Withdrawals from the faucet will only be possible if they receive it in their inbox OR someone forwards it OR copies the QR code image and shares that.
This is about damage control. Is it possible that a user forwards the email to a friend? Yes. Is that the worst thing in the world? I don’t know, up to you. The last thing you want is your faucet drained by a bunch of trolls in a bcash forum.
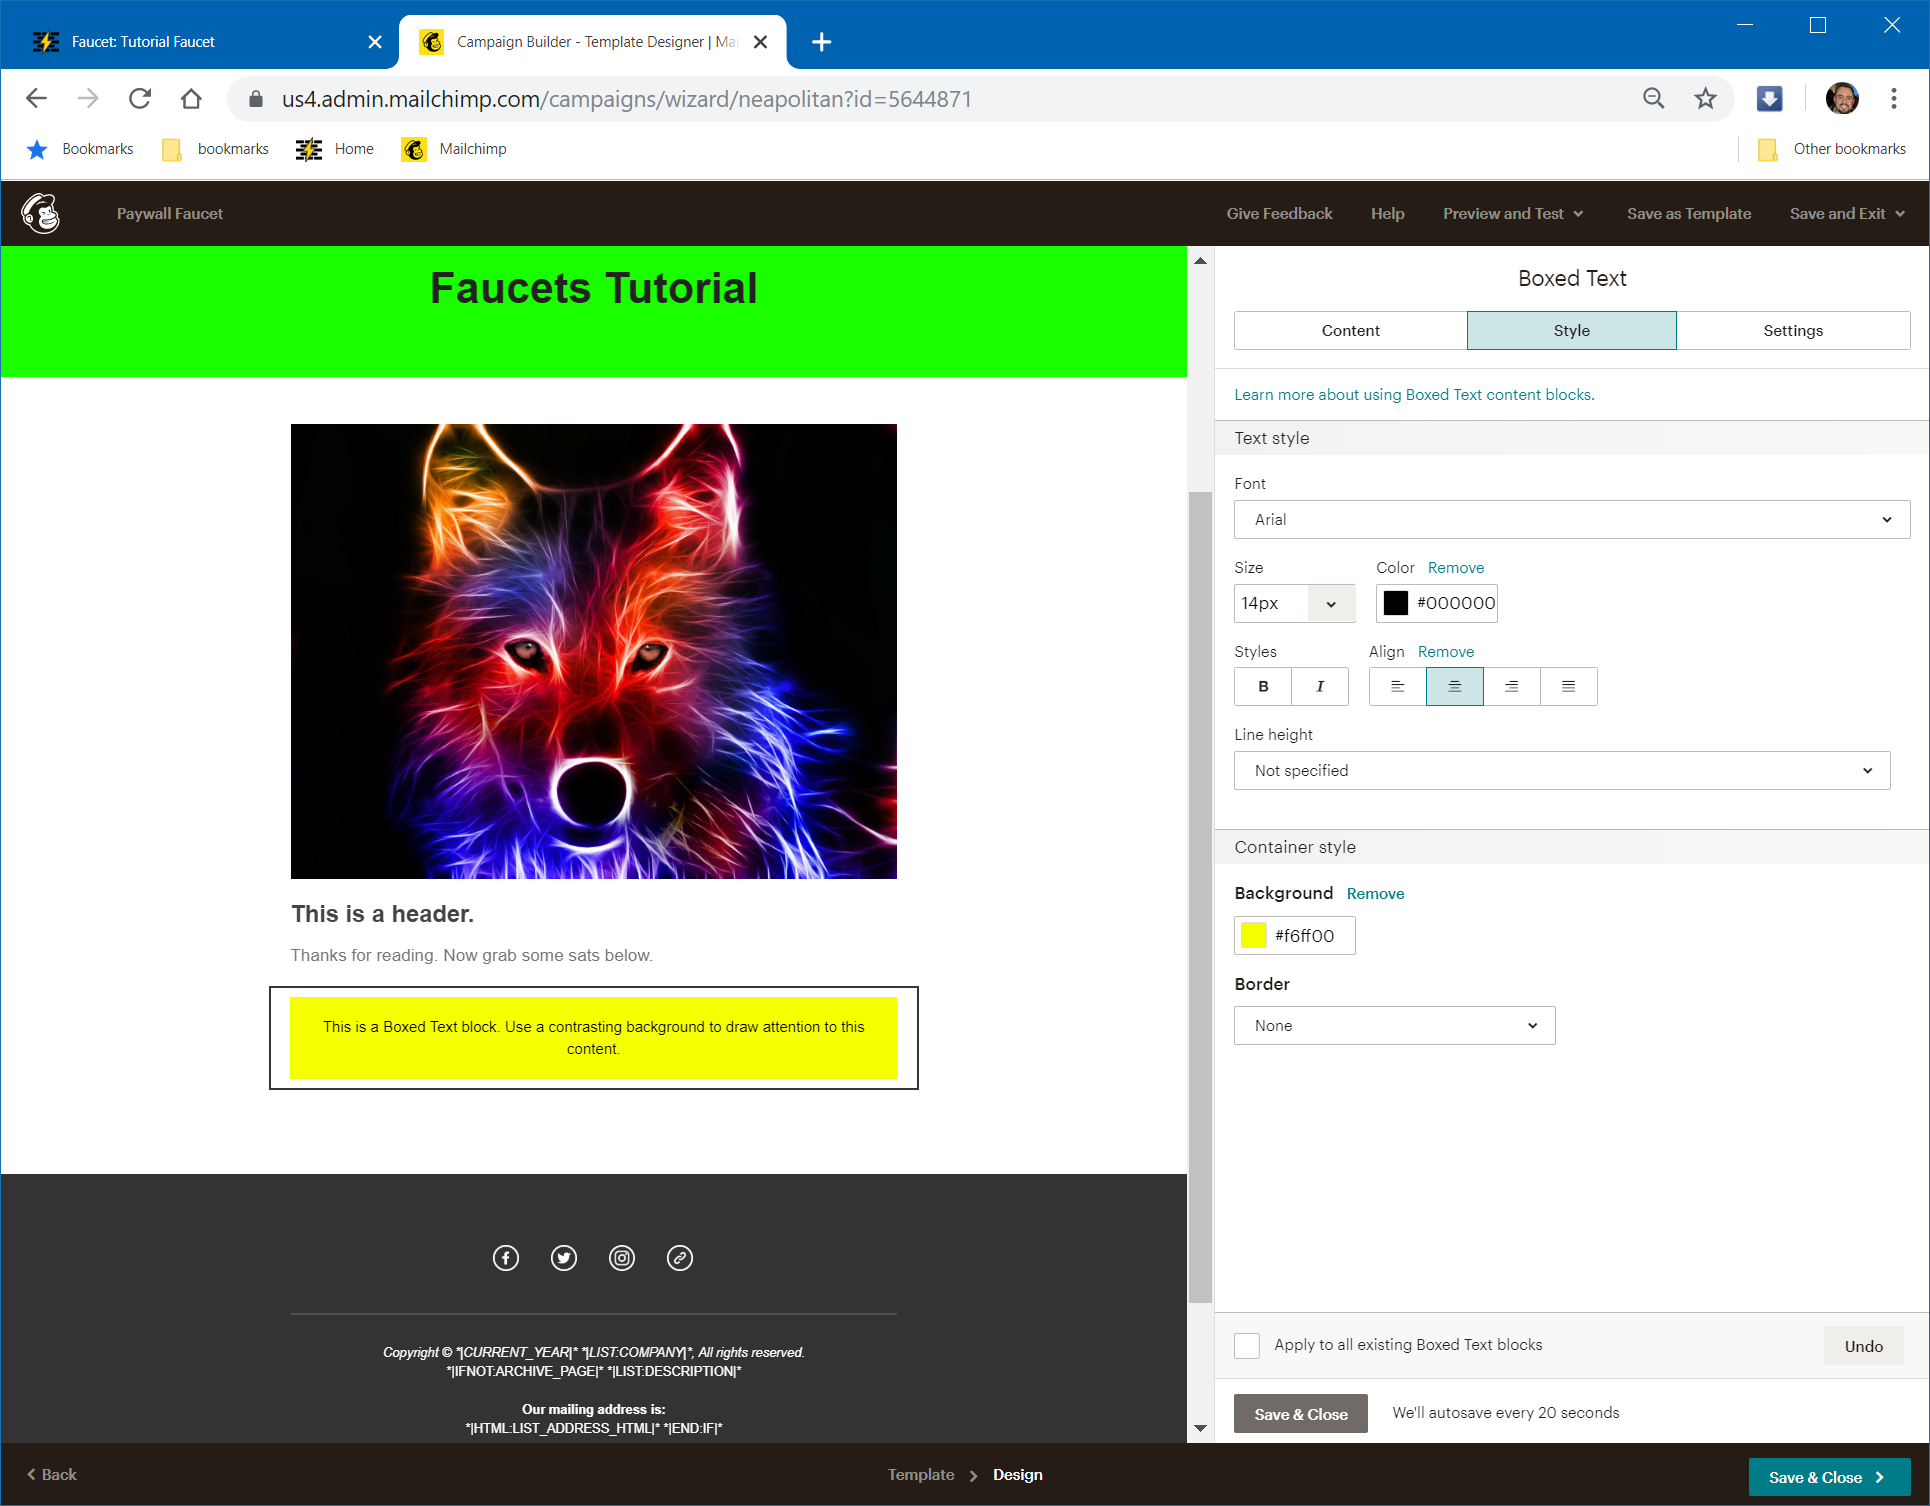
I am going to add a “Boxed Text” content block and add the faucet from there.
Here’s what a default “Boxed Text” looks like.
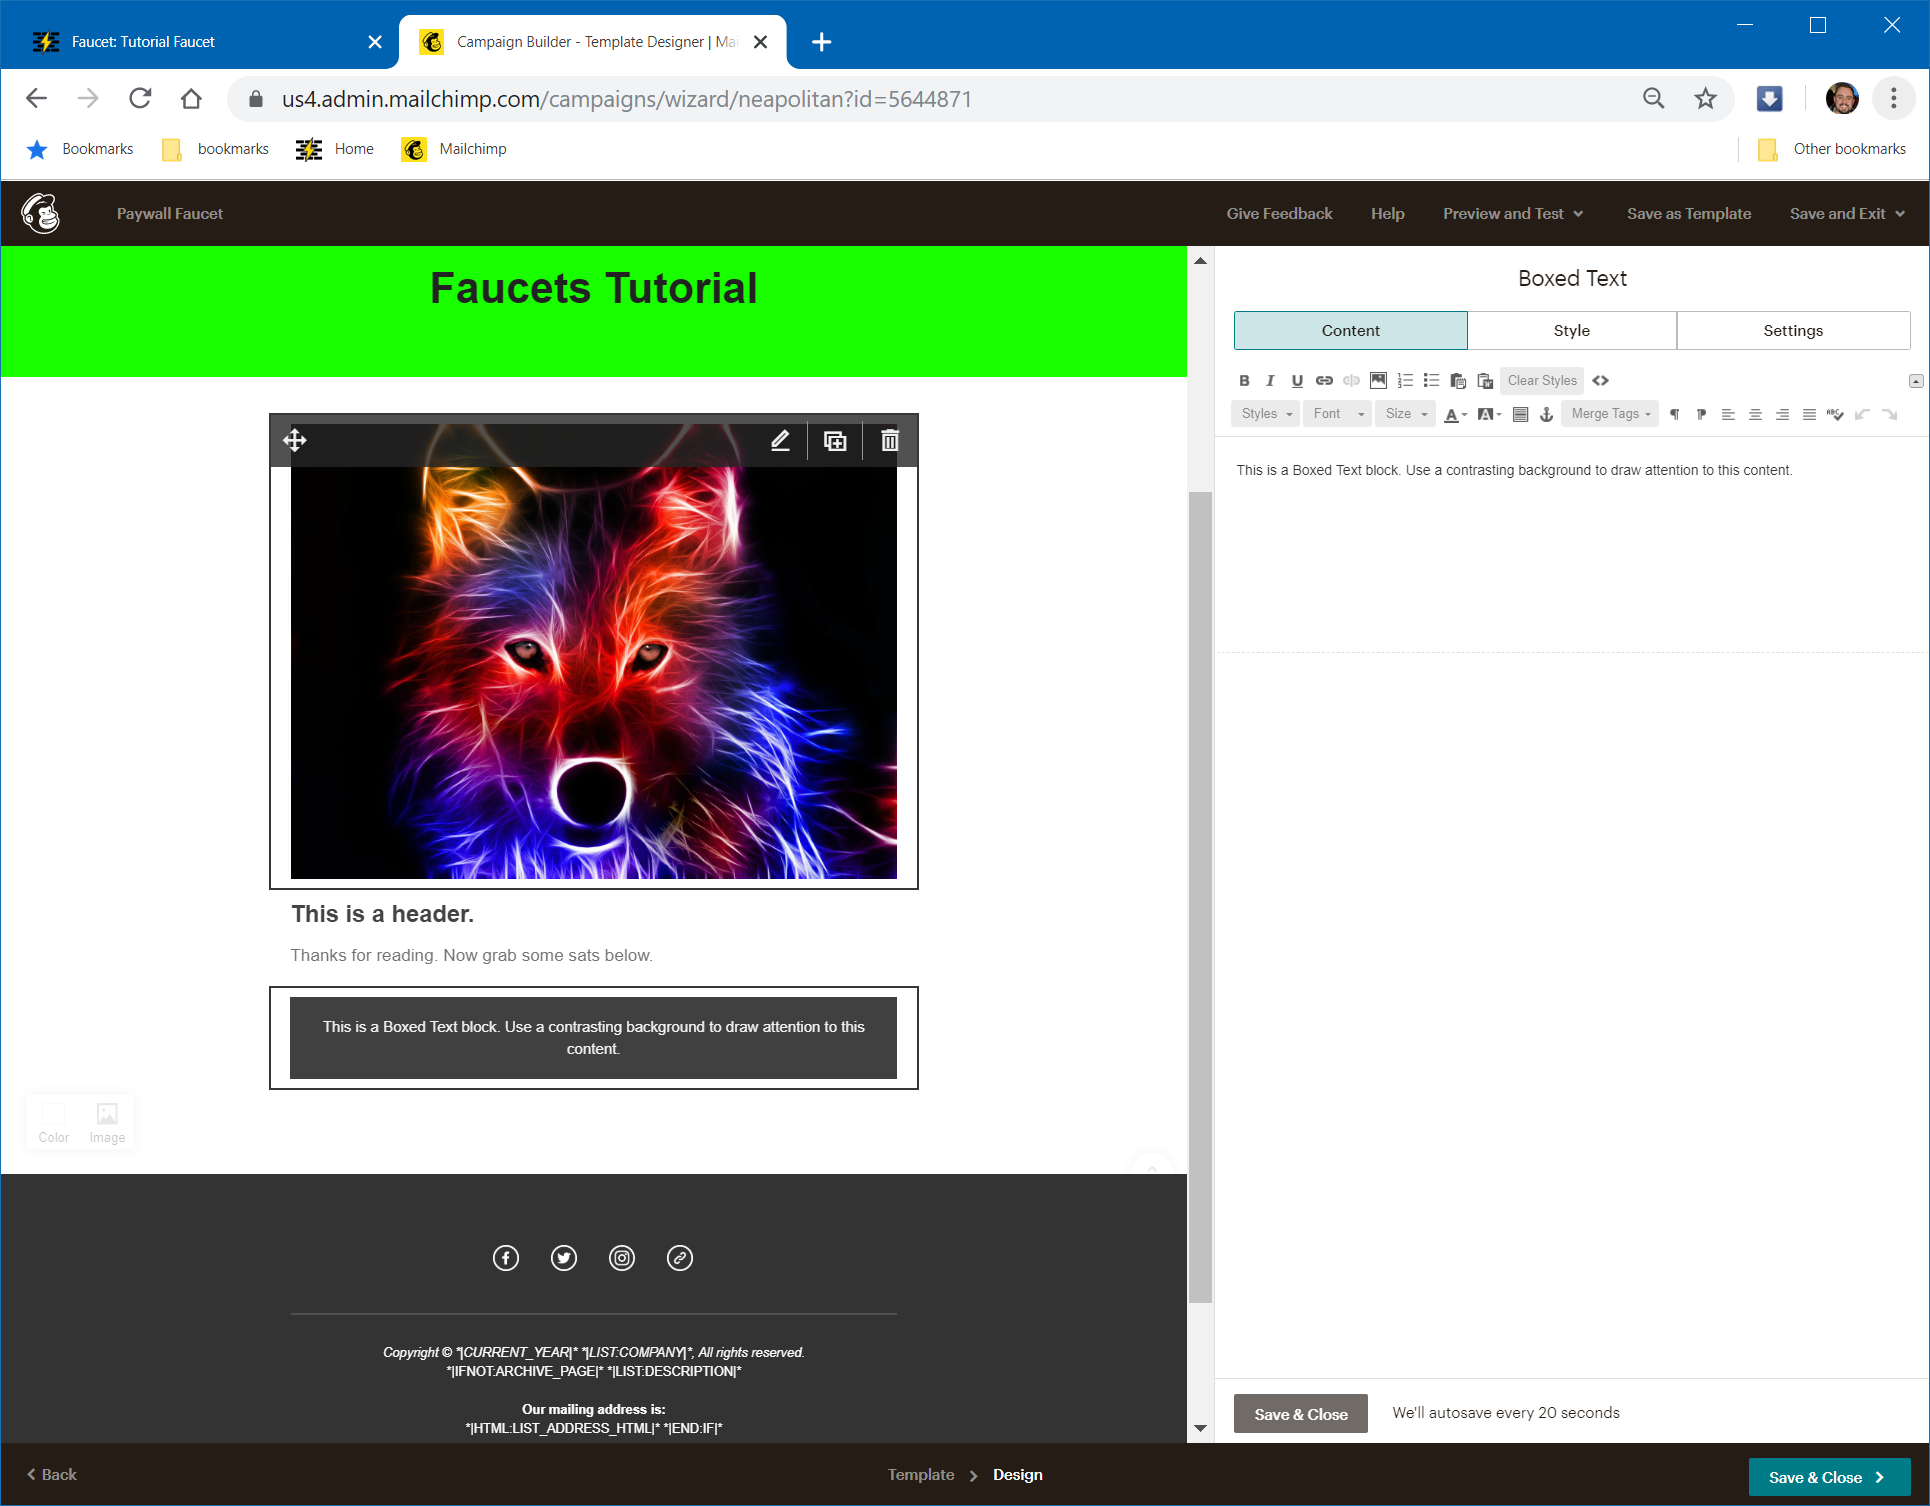
Now I’ve tweaked the box color and font color from the style settings:
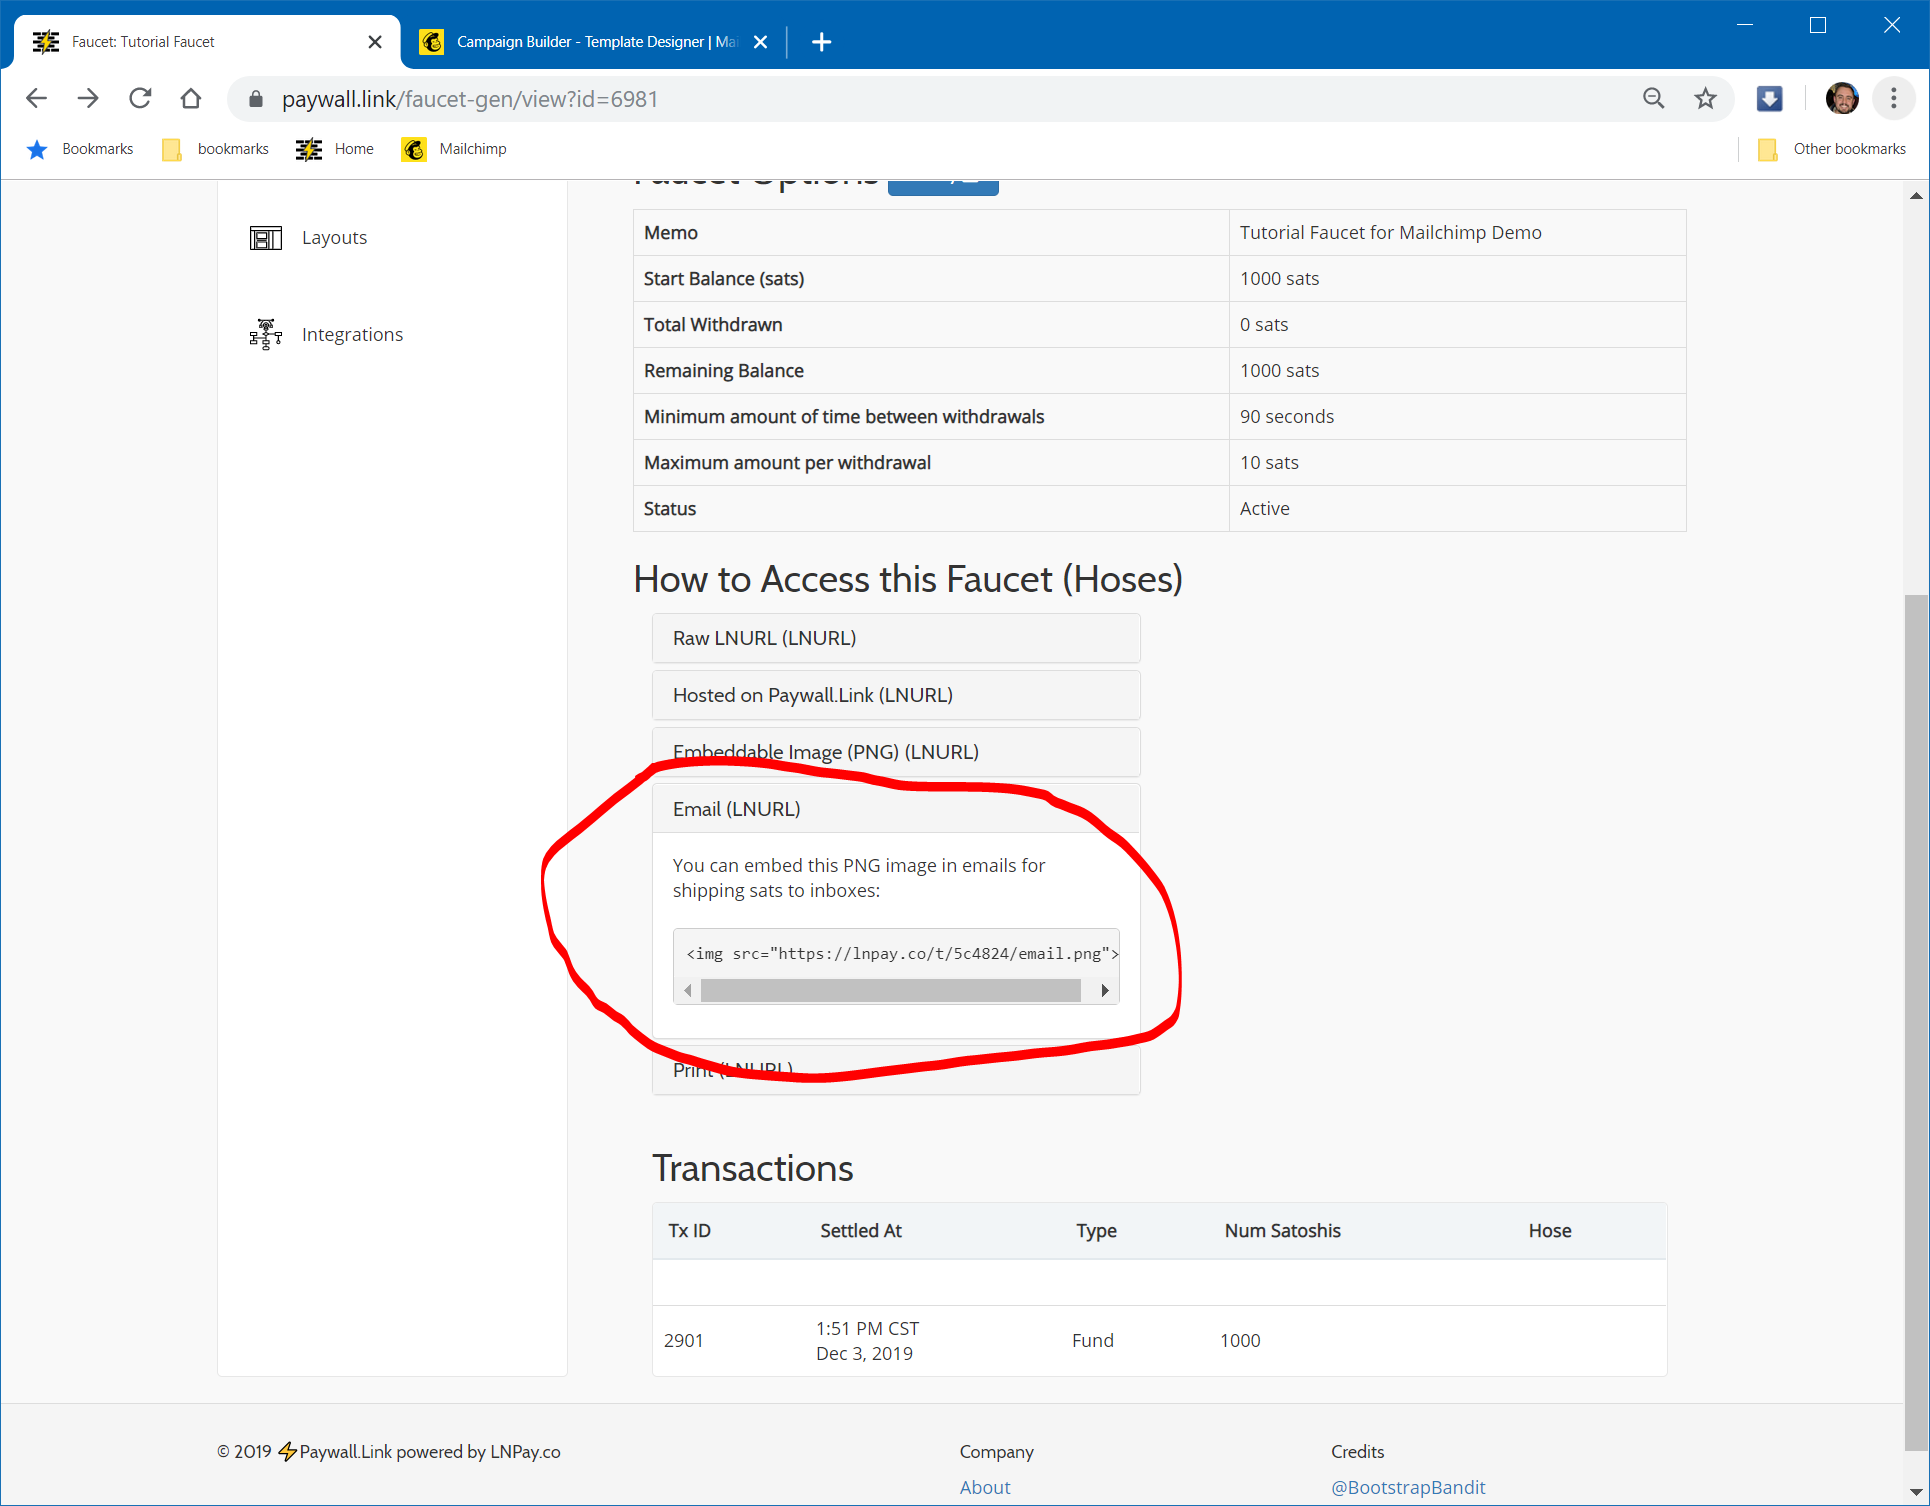
Back to Paywall.Link
Head back over to Paywall.Link and grab the HTML for the faucet, just copy it because we’ll be pasting it in just a moment:
Back to Mailchimp
Back over at Mailchimp, you need to hit this little button in your content editor, this allows you to paste HTML into the meailer.
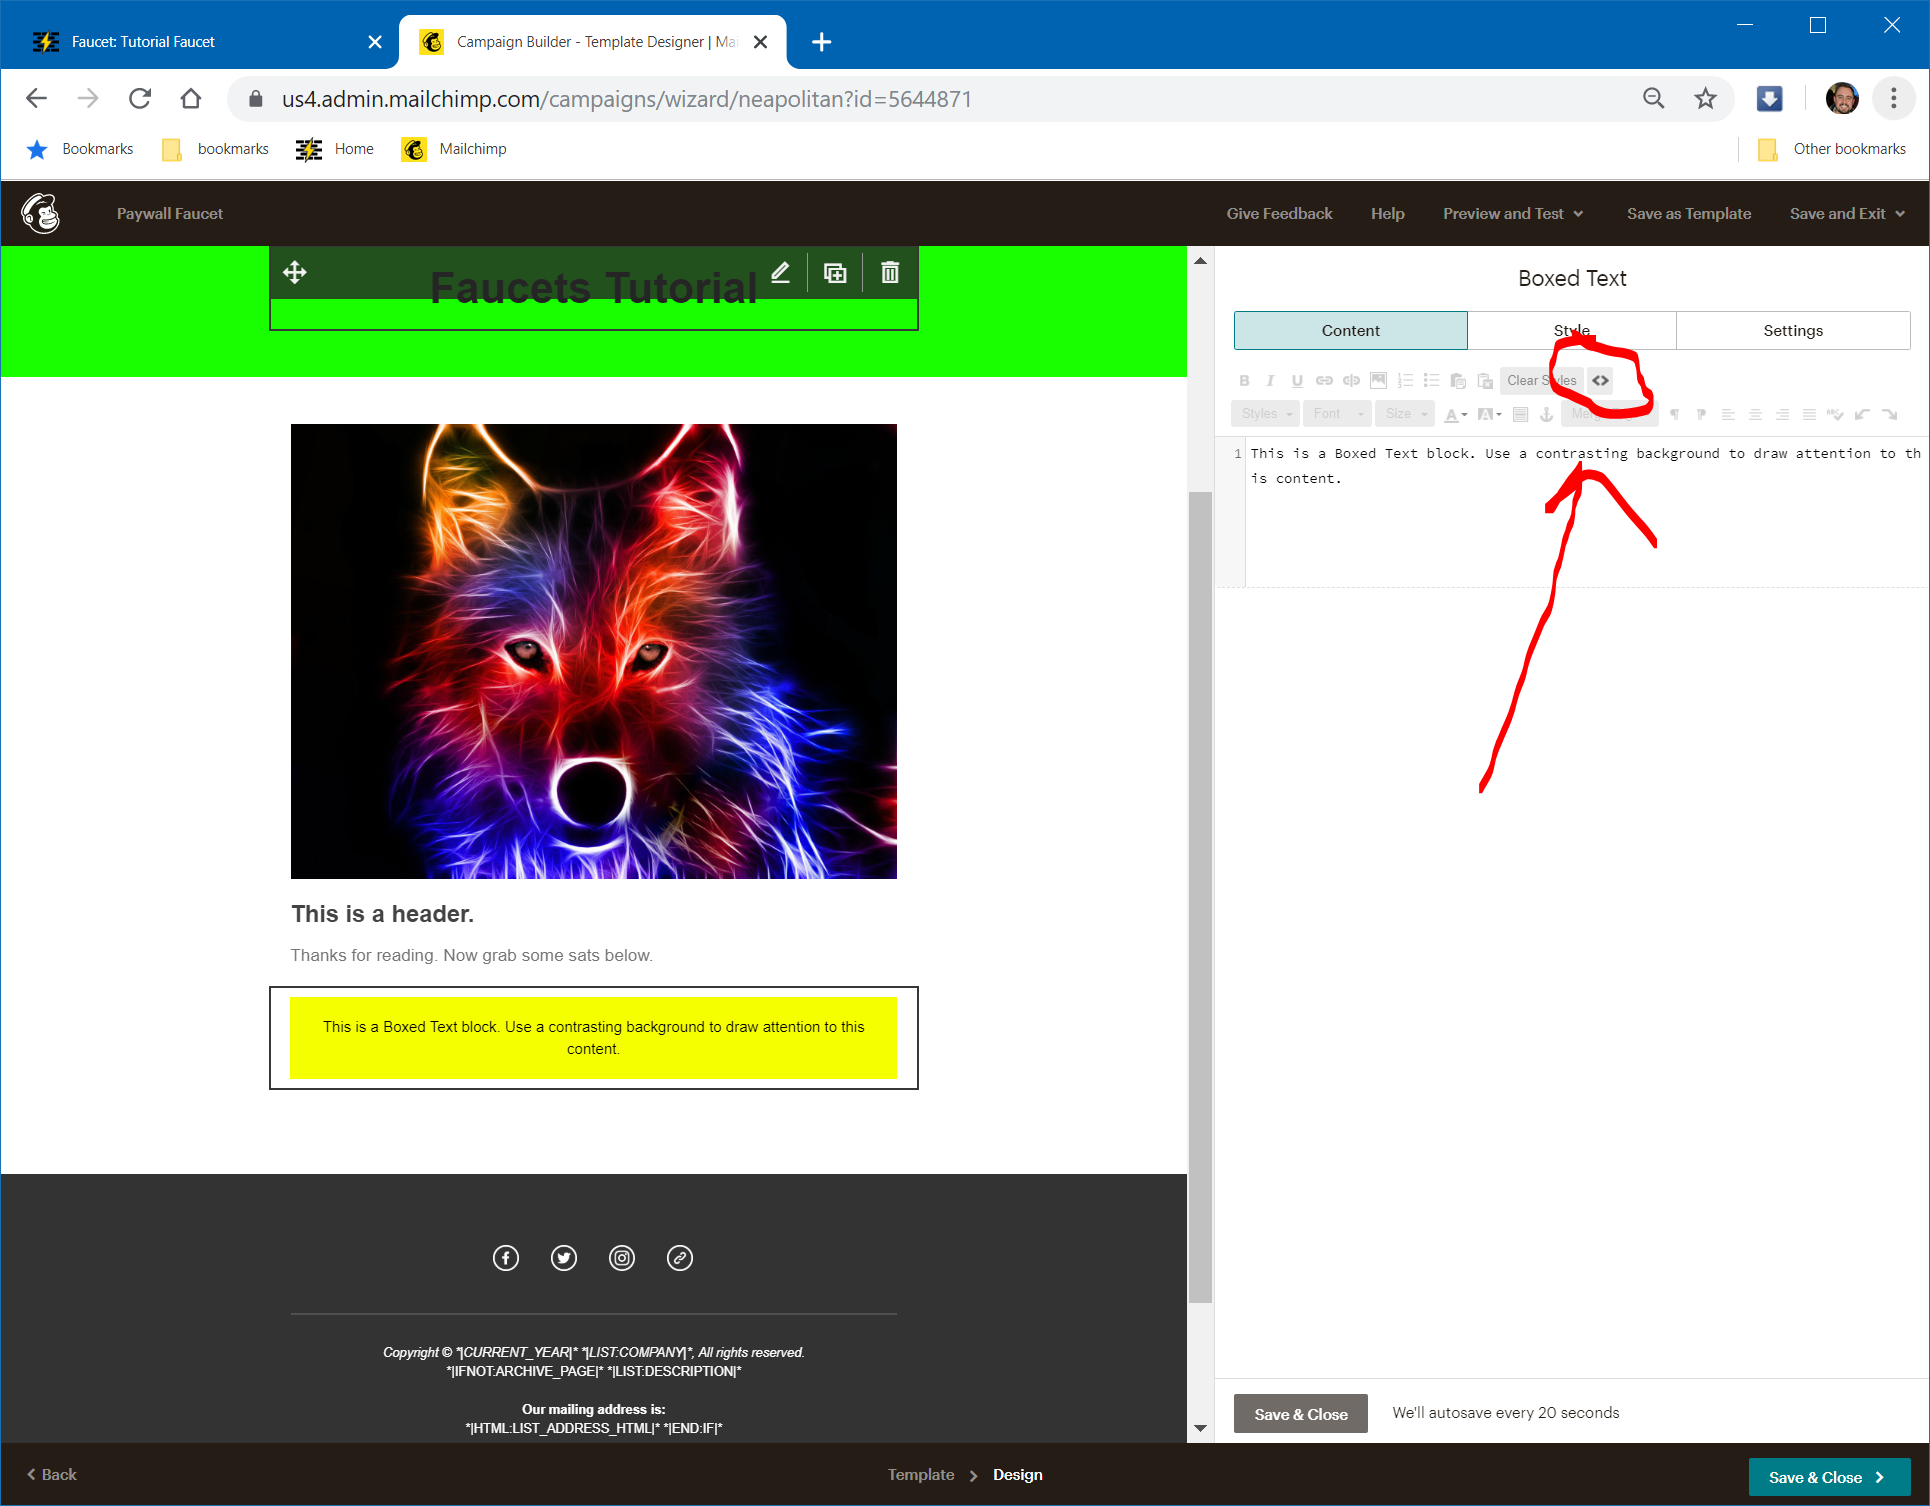
Paste your html from Paywall.link in a line under the existing words, and your image will suddenly appear in the email!
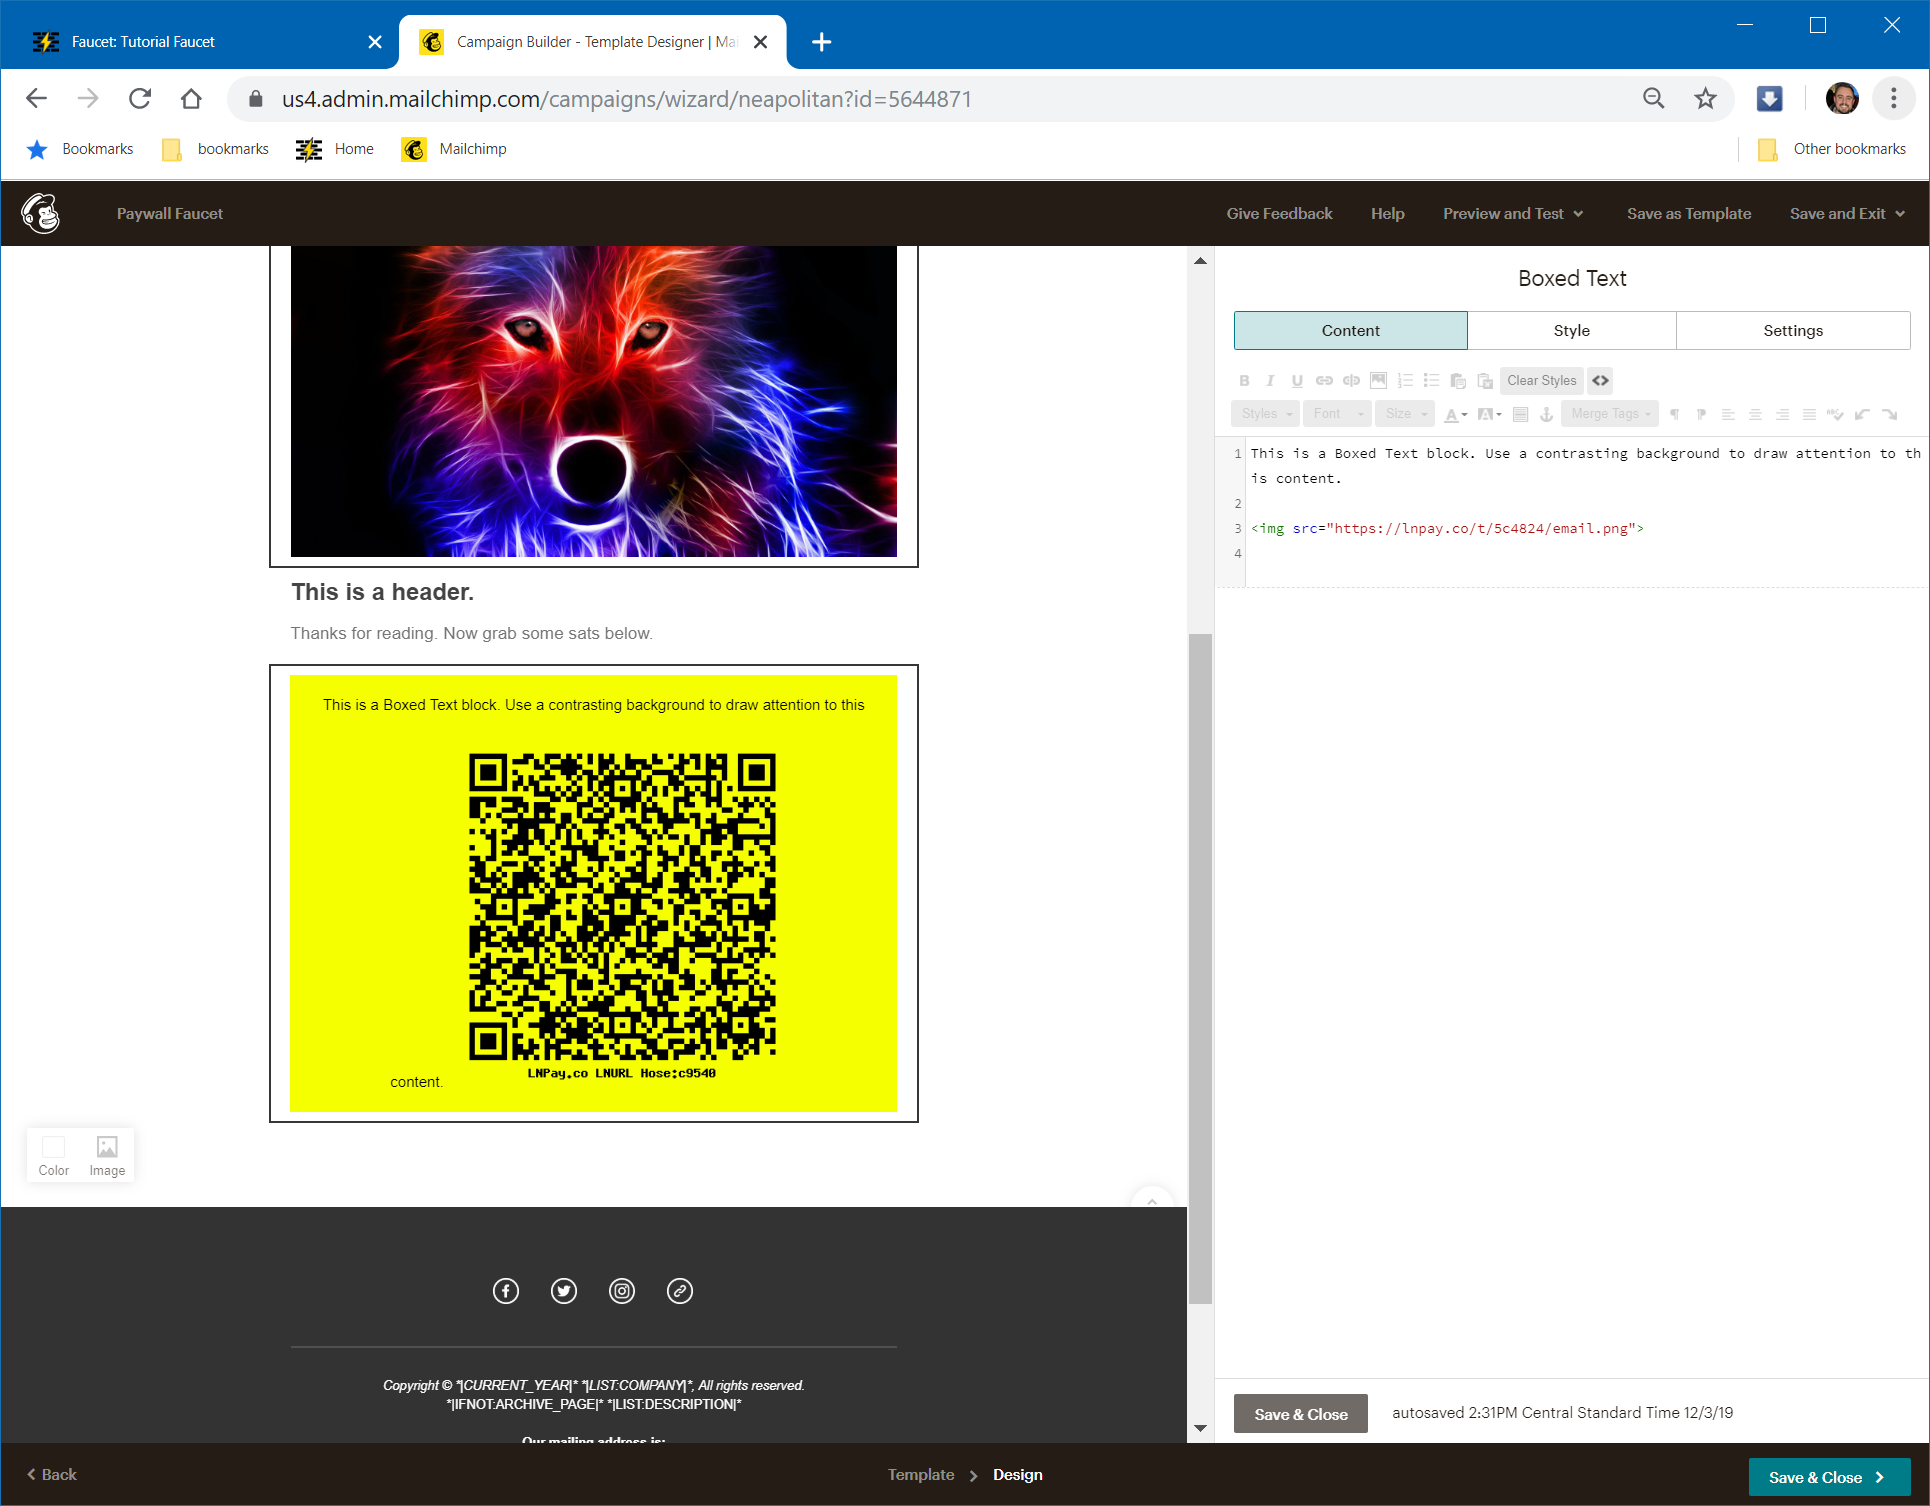
As you can see, I need to play with the words, I am going to just remove them completely and wrap up this email. As you can see, we’ve made a beautiful email that has our faucet.
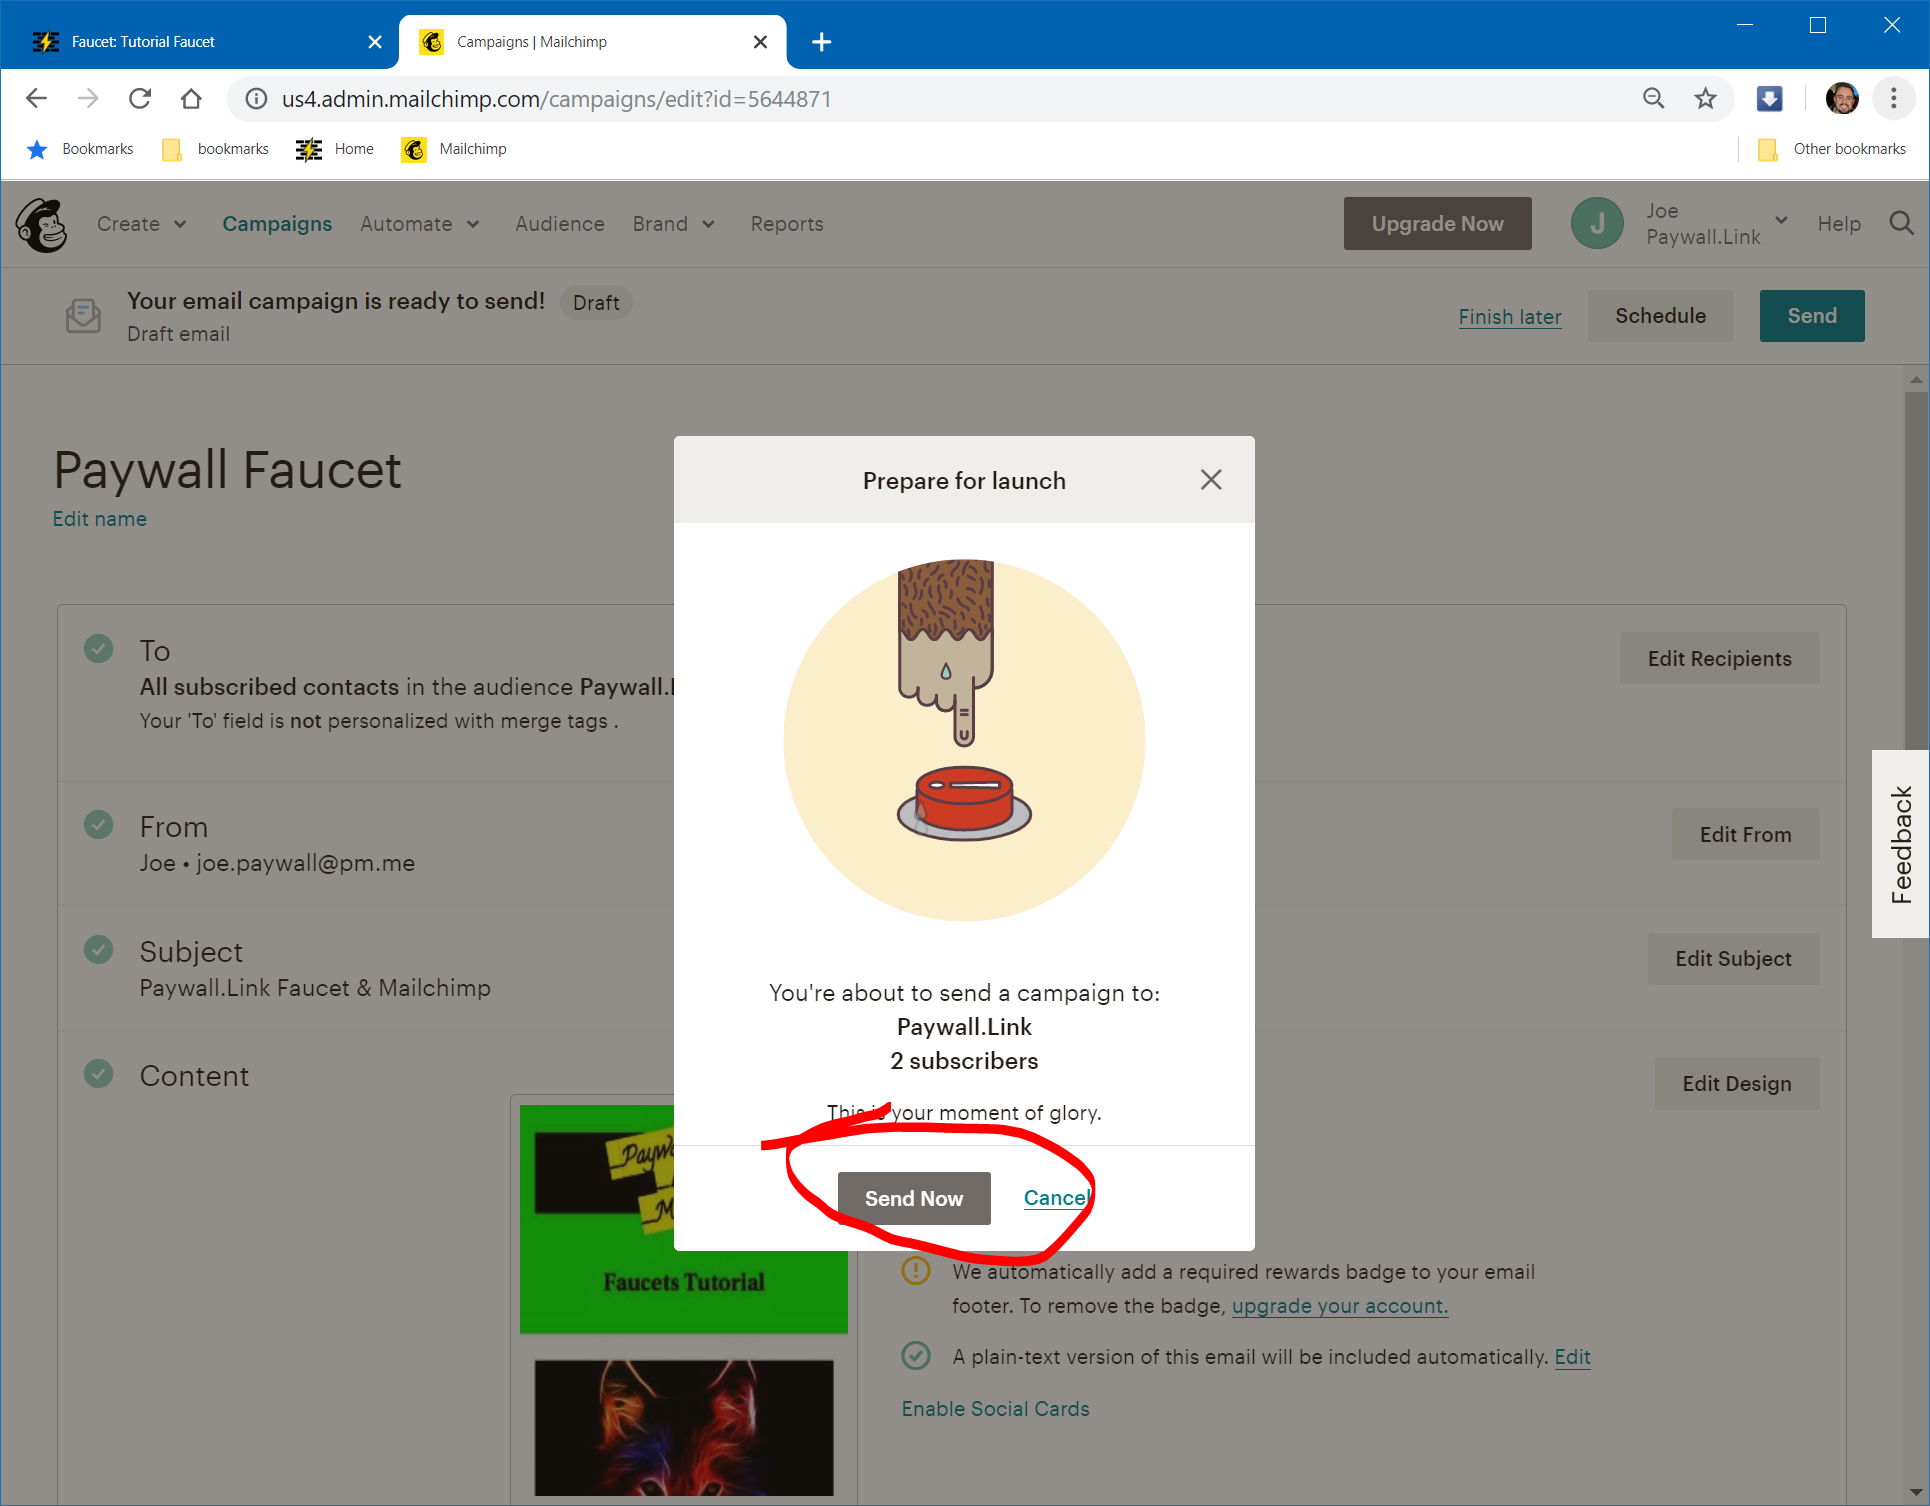
Time to wrap it up and hit send!
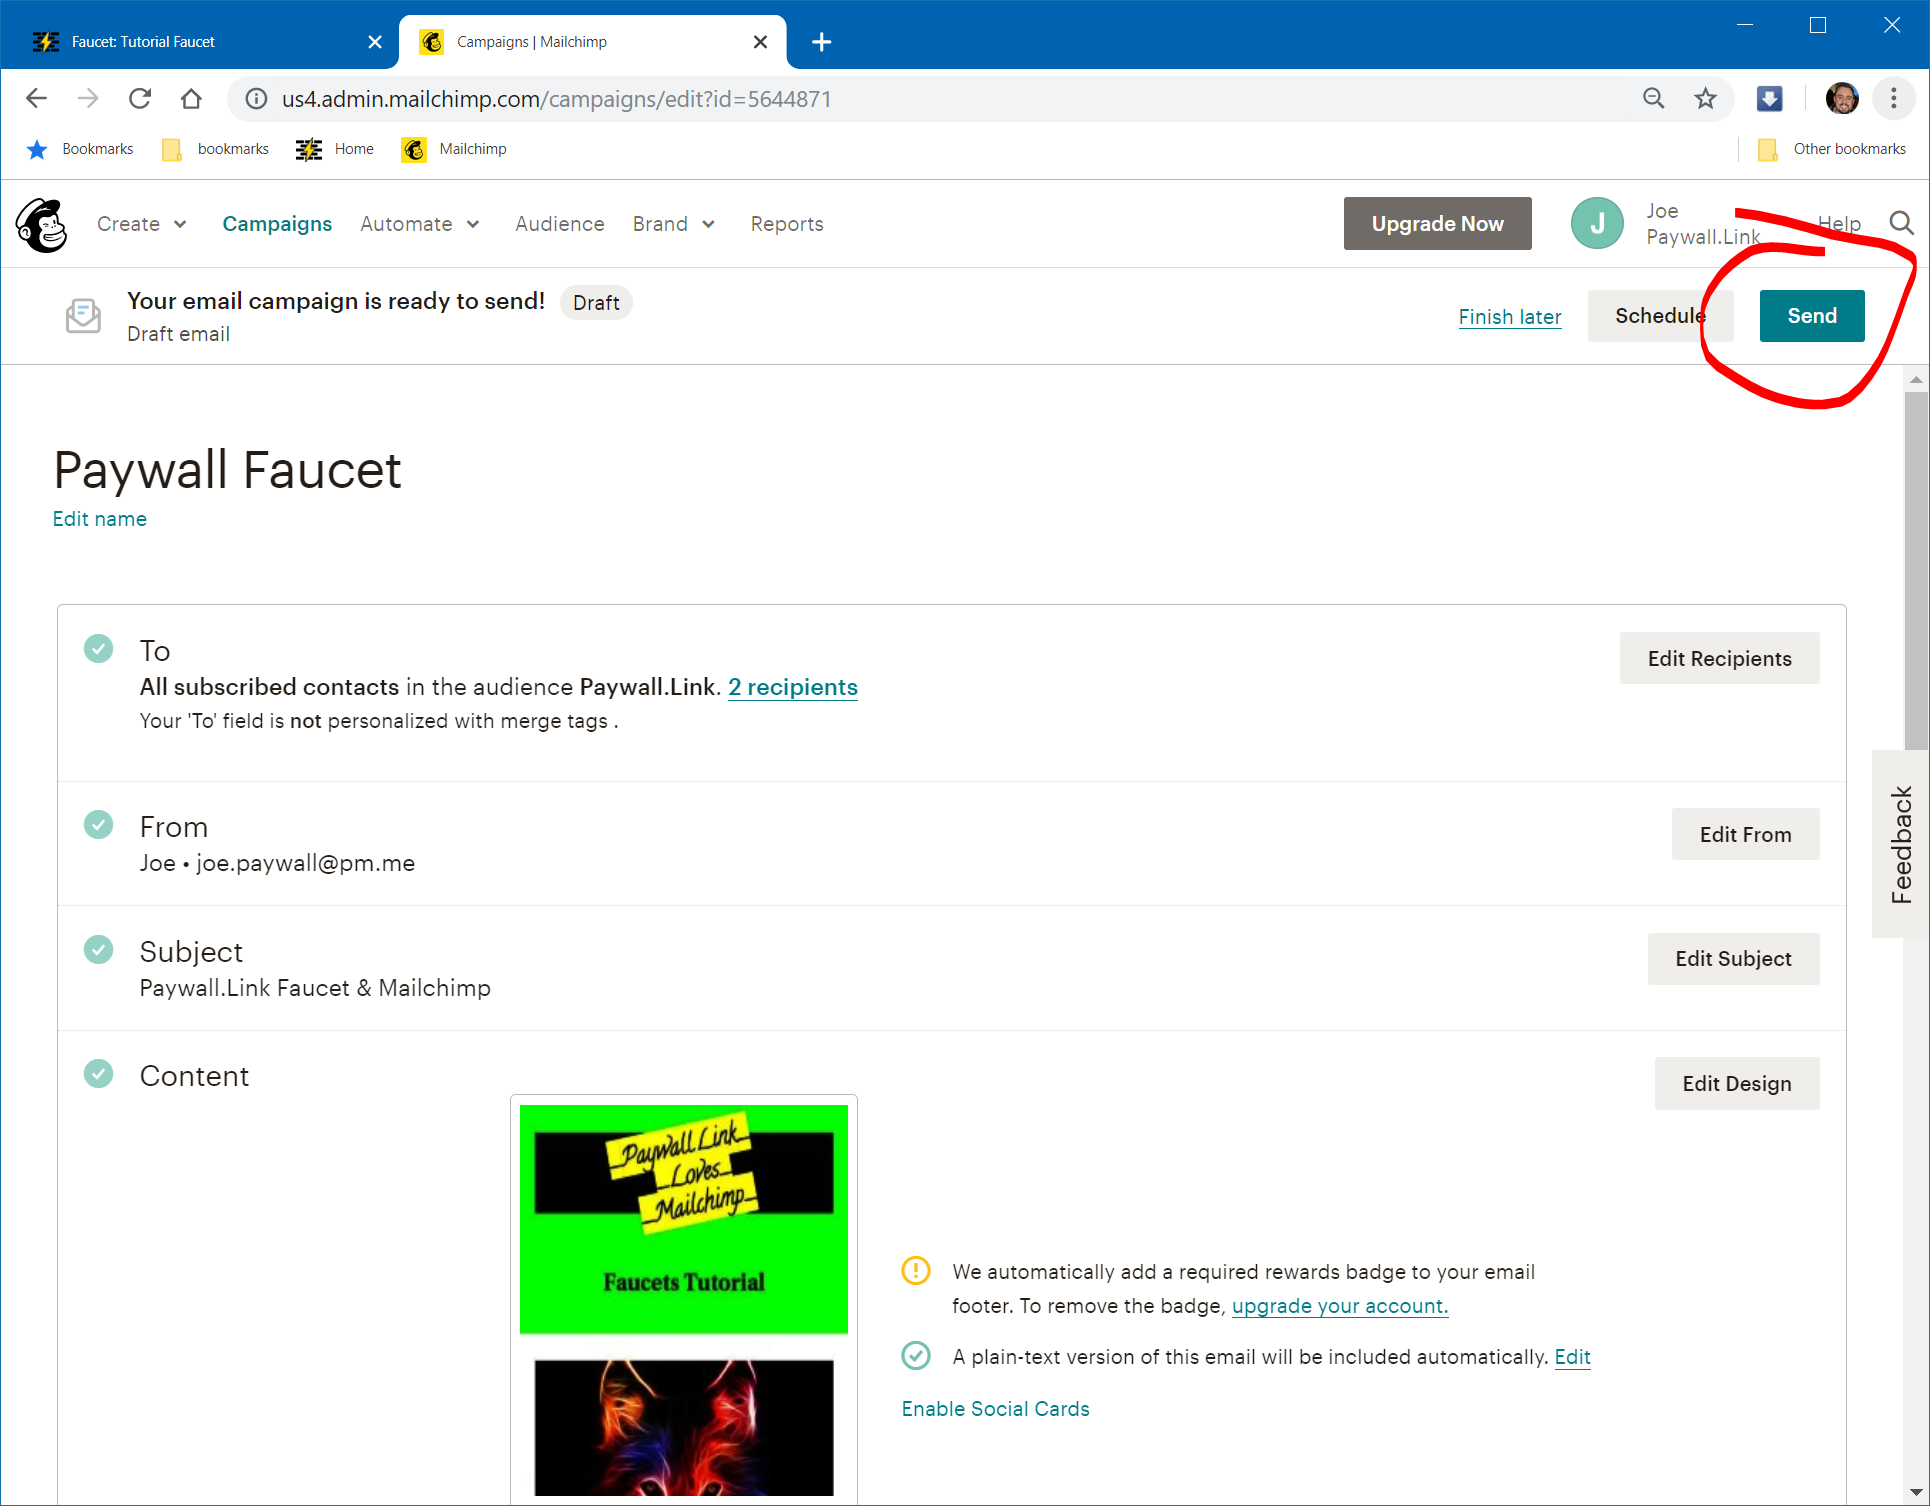
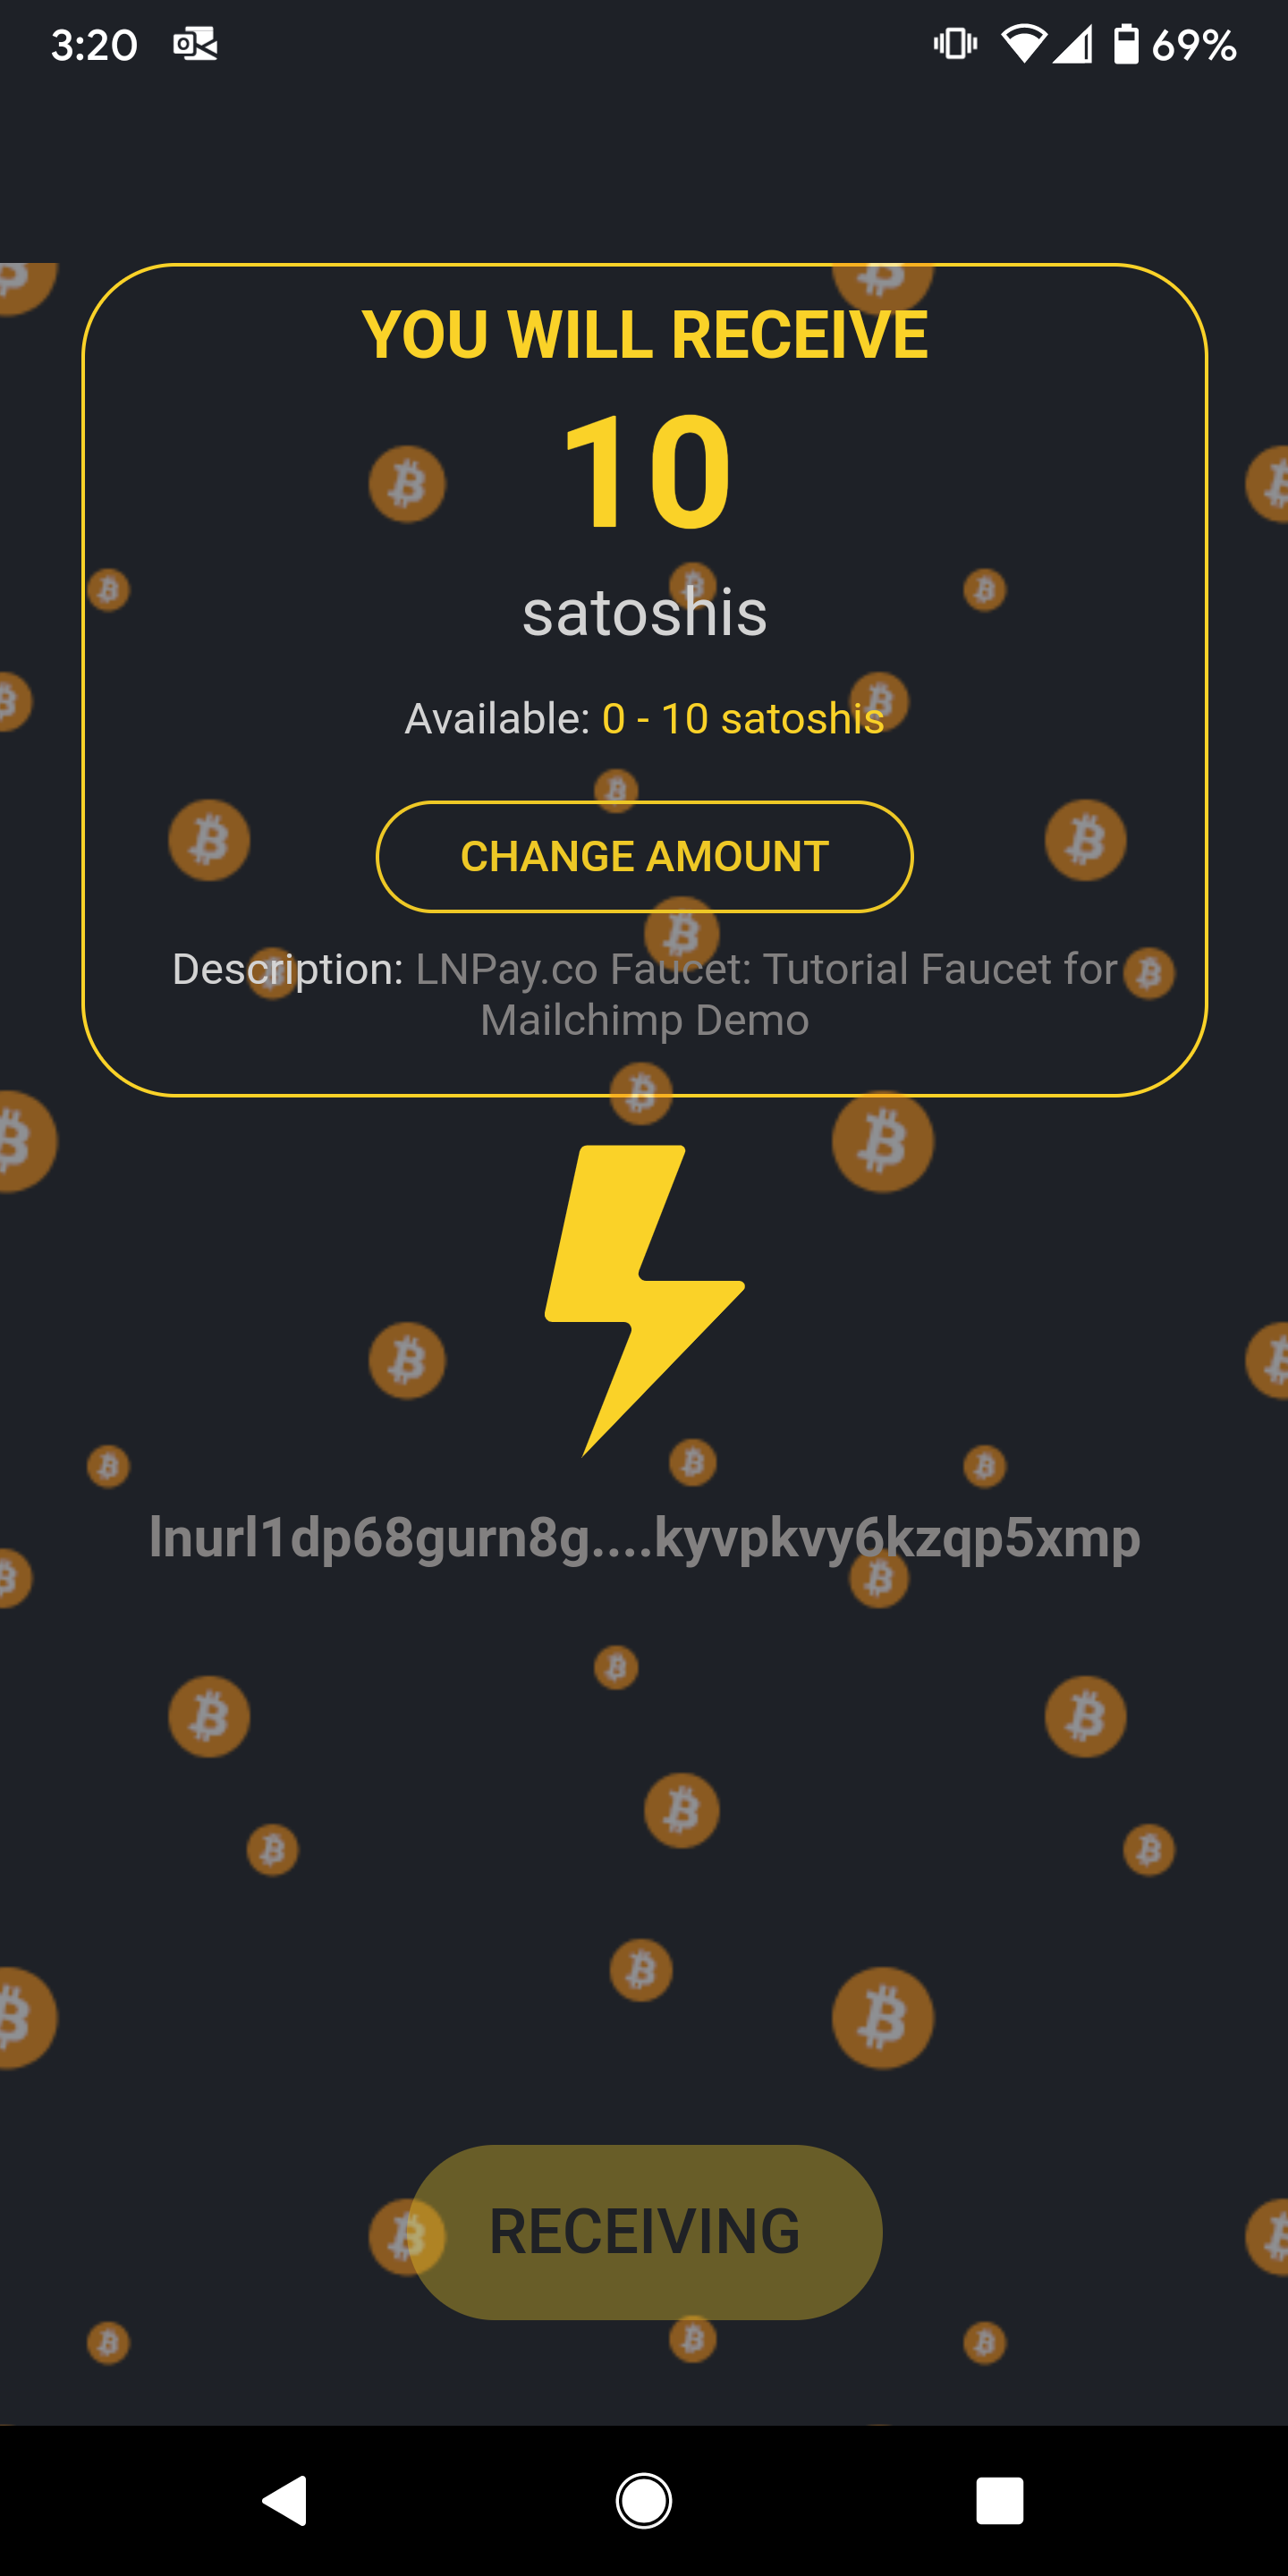
Here it is in all it’s glory!
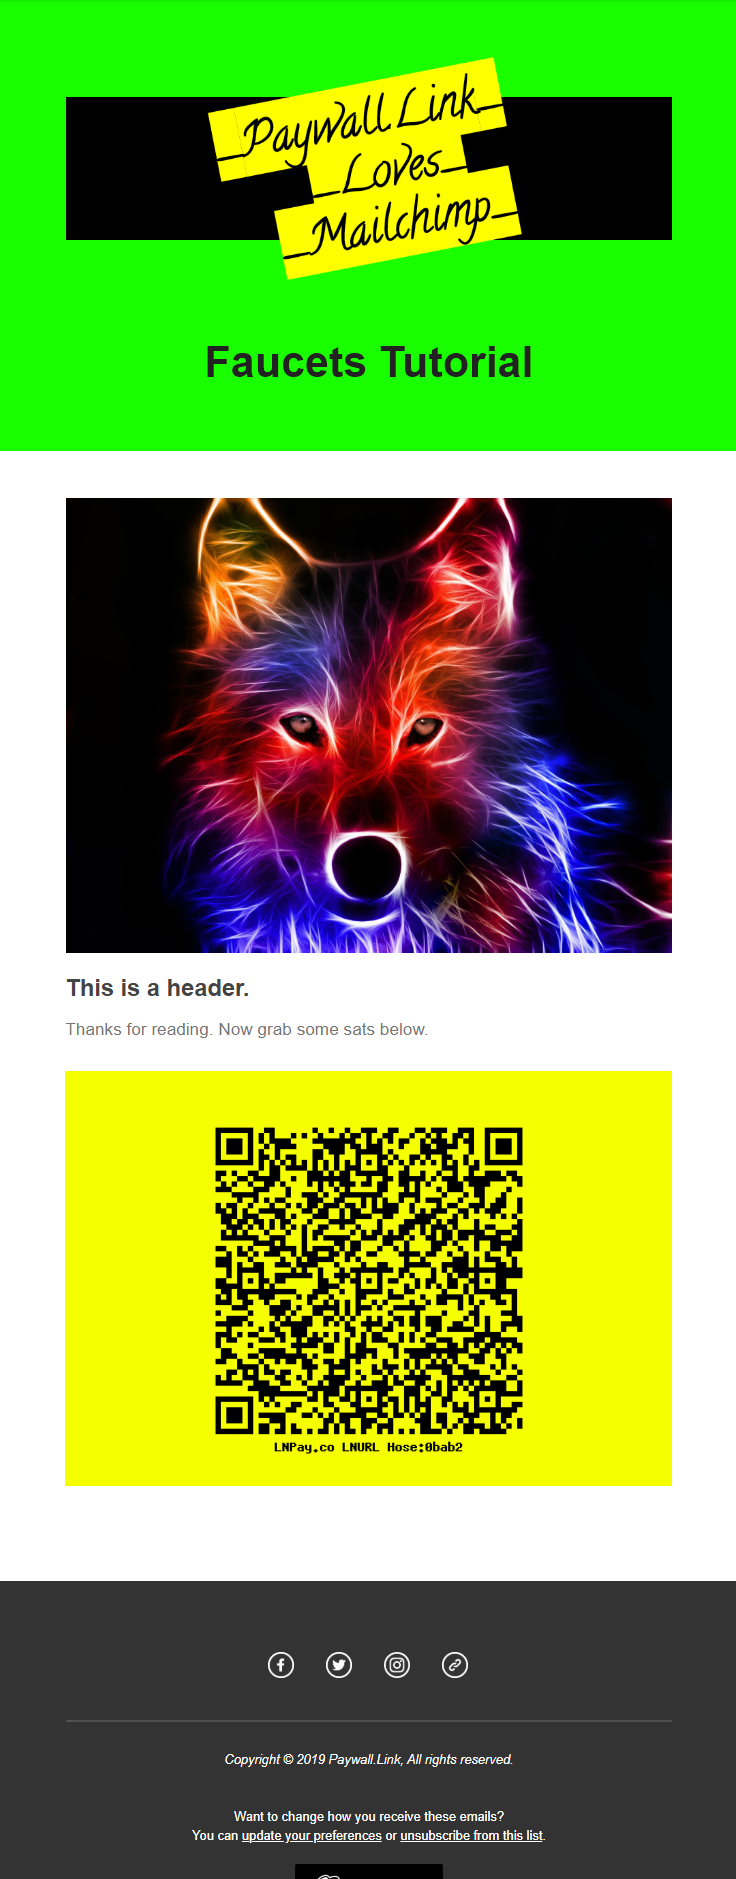
Go ahead, pull out your phone and grab some sats! The QR code works in this screenshot too!
Now track your faucet
Now that you’ve sent your first newsletter WITH a faucet, you will want to track faucet’s balance.
You can track it from the Paywall.Link facuet dashboard.
Here you can see a single withdrawal has been completed. That’s the withdrawal I made above.
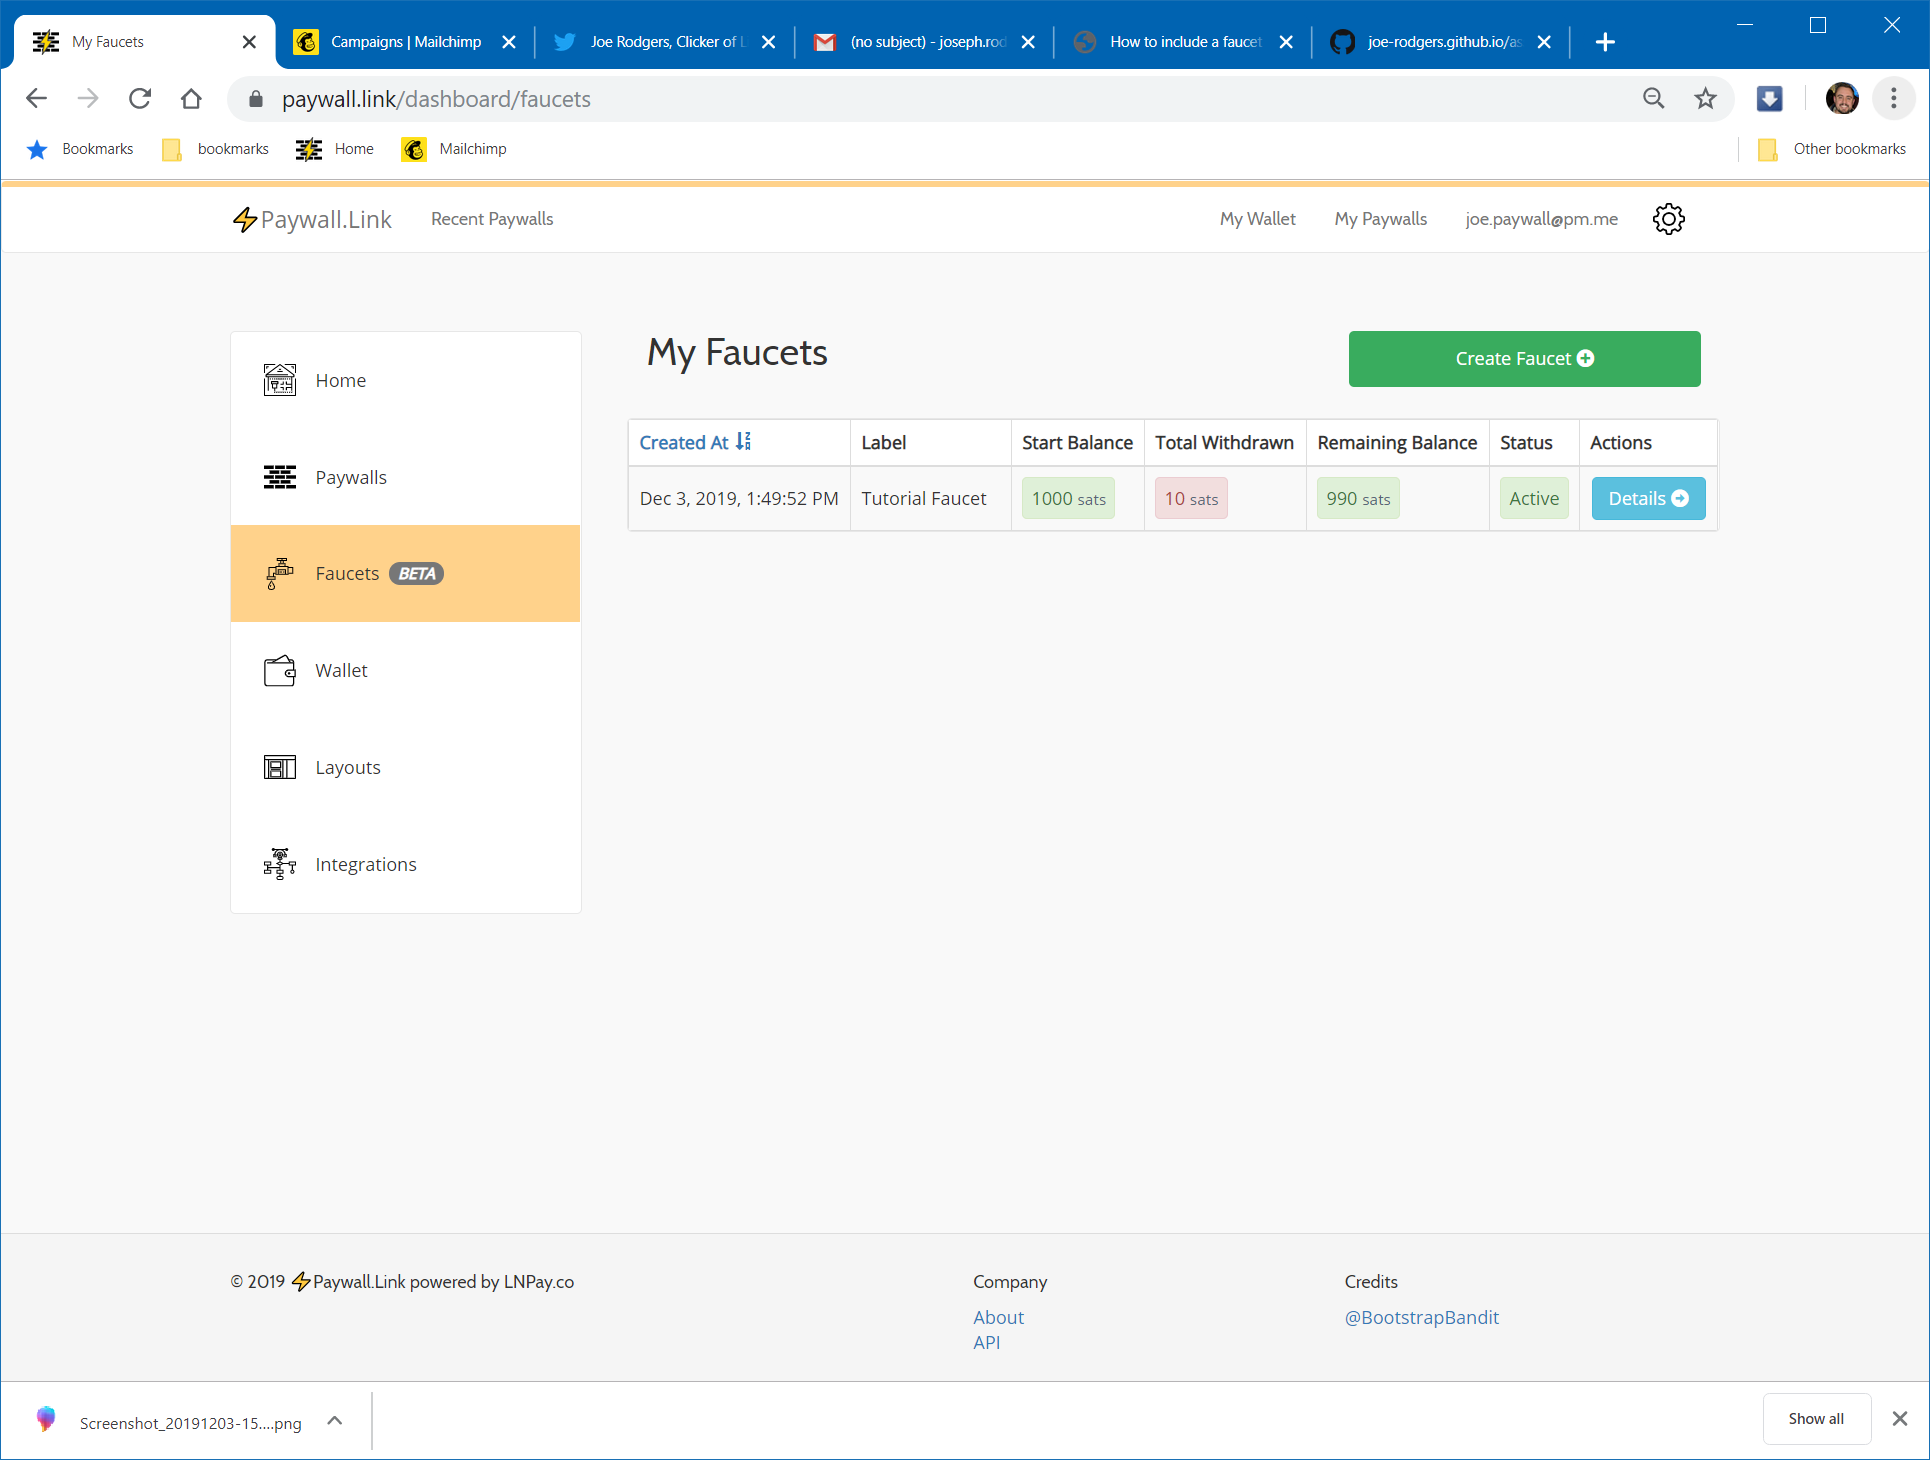
You can see that it has 990 sats remaining in the faucet.
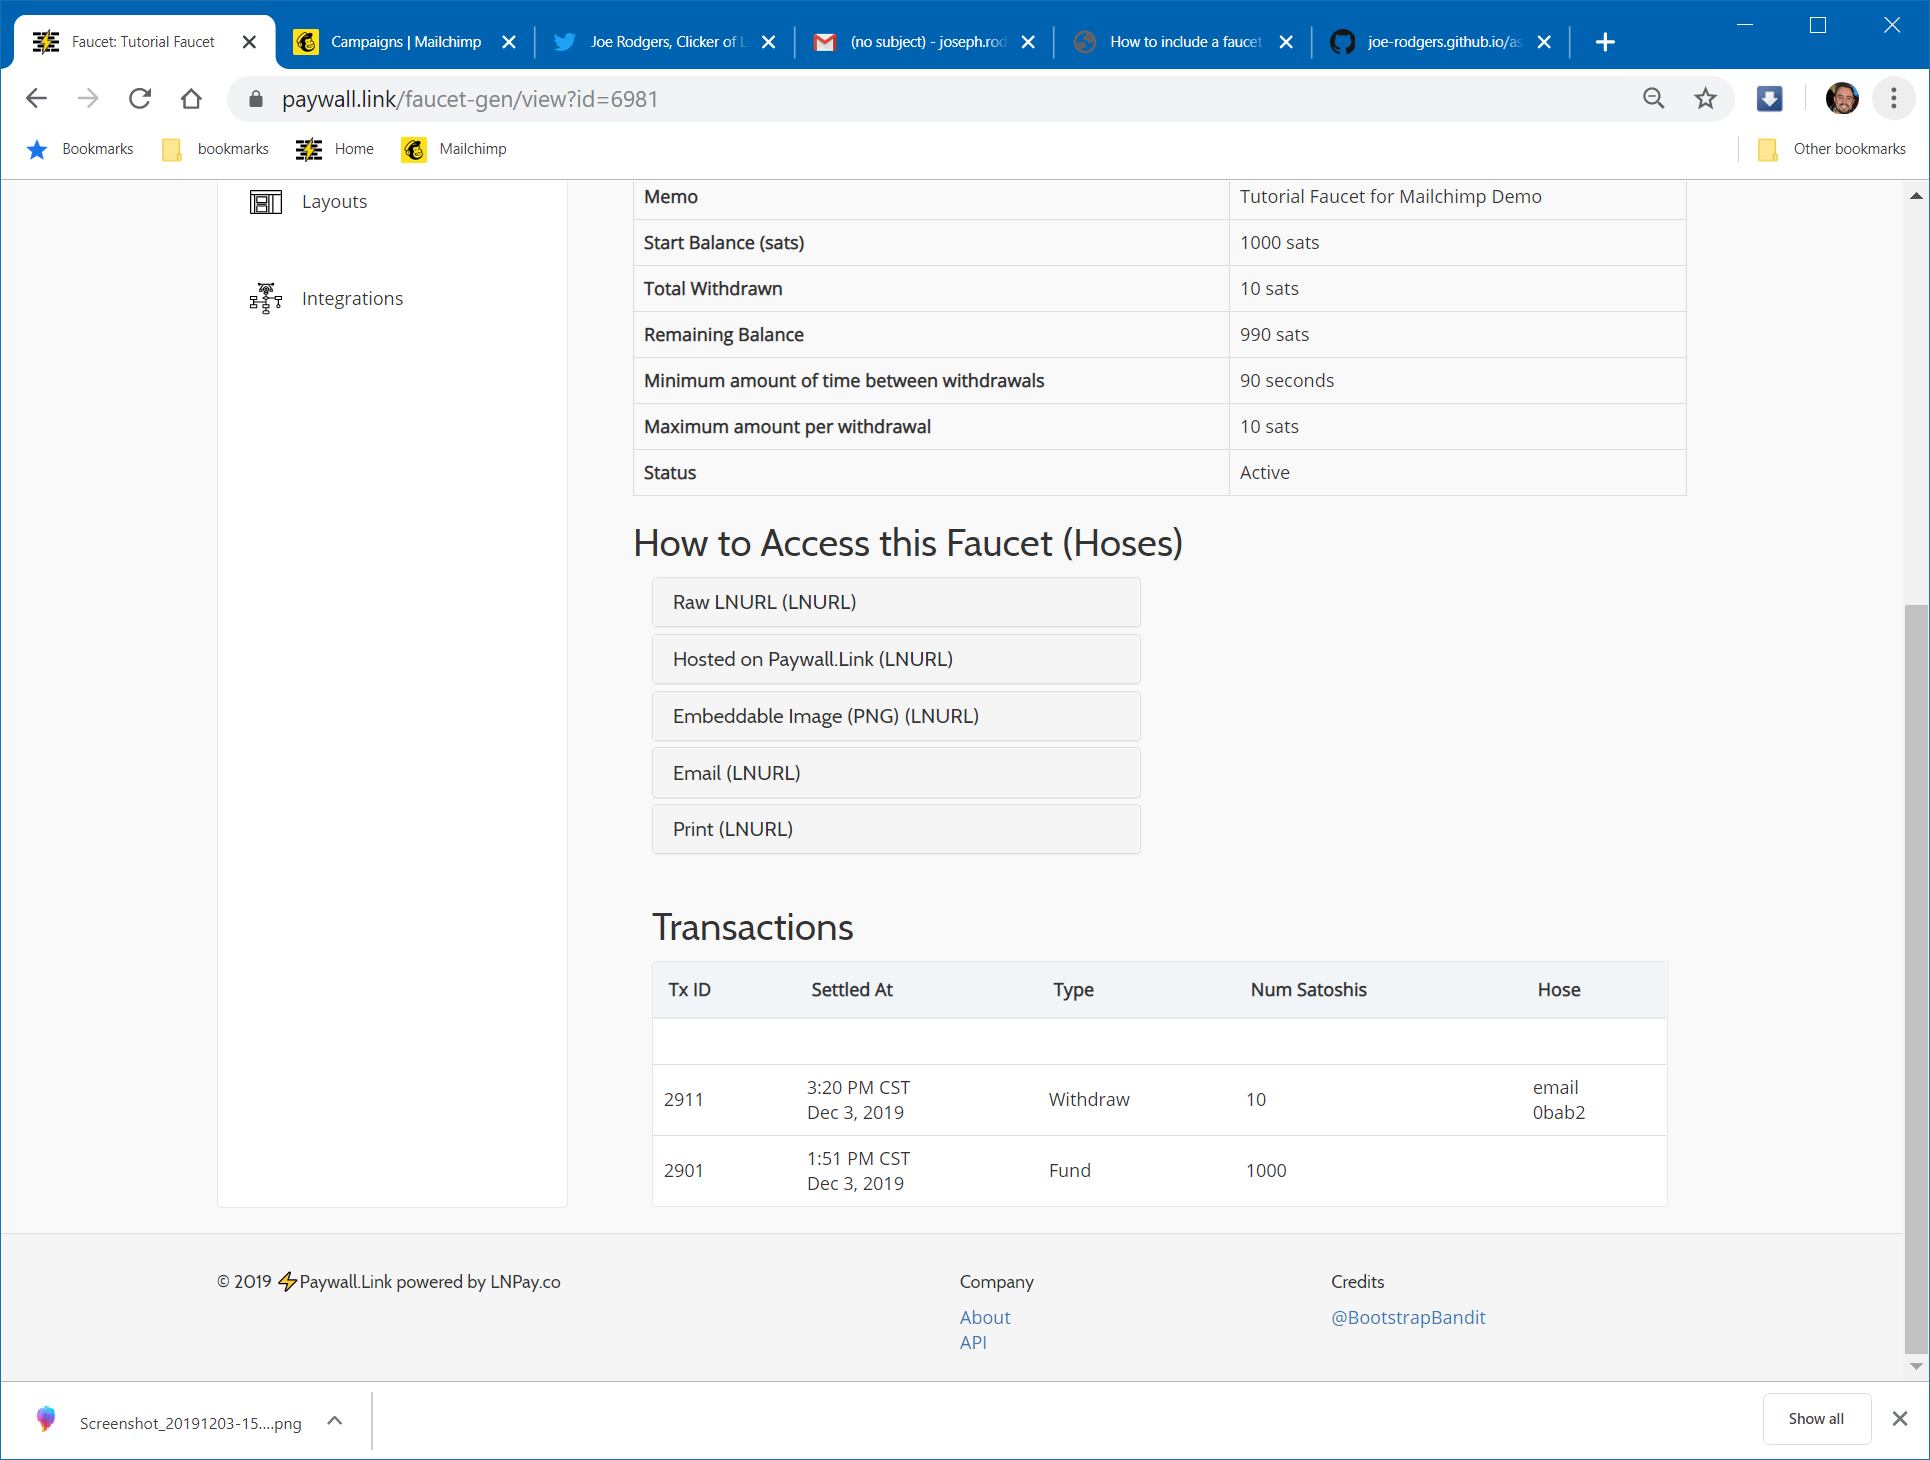
After you click into view the details of the faucet, you can see the exact time the withdraw took place. Look at the Transactions section of the dashboard towards the bottom. Pretty cool!
Mailchimp has it’s own dashboard that tracks opens and clicks within the email. Feel free to check that out. As you build out your skillset, you will want to become familiar with the reports and other advanced features.
Wrap Up
Today we learned how to create and fund a faucet. We learned how to setup an email campaign on Mailchimp. We learned how to insert a faucet into an email campaign.
There are more advanced methods of using Paywall.Link and Mailchimp.
If you get elbow deep in Paywall.Link and need some help, or you’d like to join the community, join us on telegram.
Thanks
I hope this was helpful. Please let me know if you spot any typos!
If you’d like to connect, reach out to me on Twitter.